post

Summer Painting of Plums

Thank goodness I love plums. I have a Shiro Japanese plum tree in my backyard that gives me 2,000 plums most years. I work really hard to use as many as I can, and my refrigerator is comically filled with around 1,000 plums. If you need a plum recipe for anything you can possibly imagine, let me know—I’ve probably tried it! Better yet, stop by if you’re in the neighborhood and I’ll give you some fresh plums or some homemade jam.

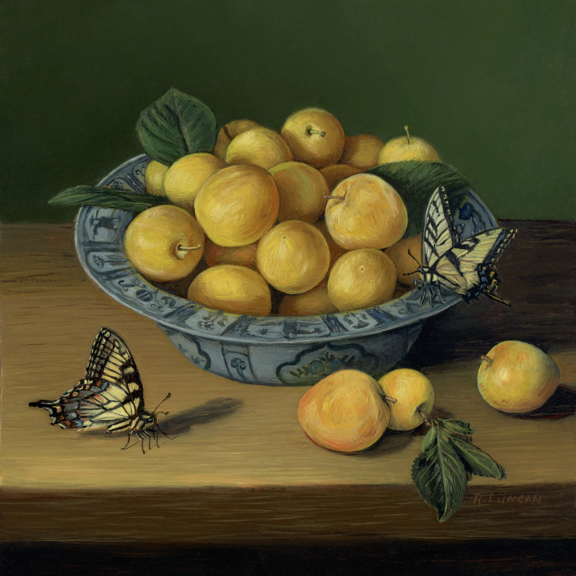
I paired the plums with my favorite kind of butterfly, the Tiger Swallowtail, which is a frequent visitor to my garden. I also referenced an image of one of my favorite porcelain bowls in the Seattle Art Museum collection.

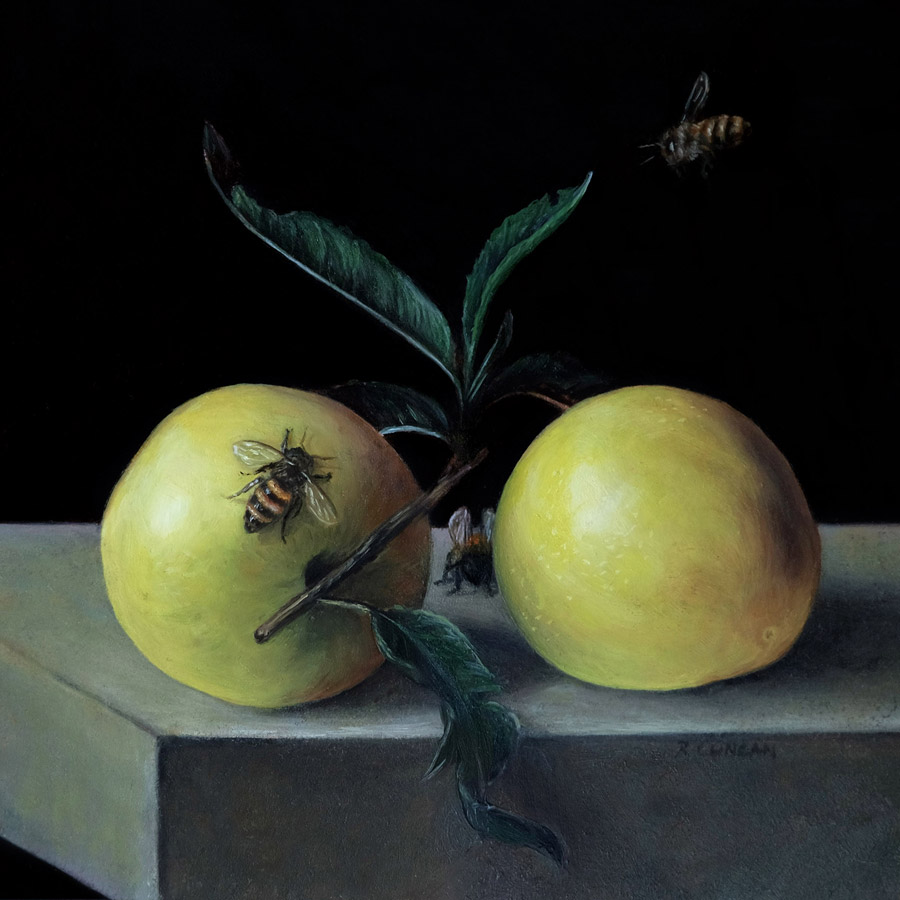
It’s surprising to me how happy it makes me to look at these plums, given the countless hours I spend peeling and pitting them. They really are delicious, but it’s also the beauty of the plums themselves. They’re just bursting with life, and the difference in color between the white, powdery bloom and my bright yellow fingerprints just dazzles me.

These little joys are more important than ever right now. Little obstacles and conflicts that used to be so easy to brush off now have a way of feeling insurmountable. Our son is five and is supposed to start Kindergarten on September 7th. We’re worried about the new Delta strain that is more likely to harm children than previous variants of COVID, and we just don’t know what to do. It’s not always possible, but I’ll give you the advice I’m trying to give myself: give yourself some slack and some time to just relax and breathe.

I hope this painting inspires you to go outside, close your eyes to all your troubles and enjoy a bite of summer. 💛

Visit my Monthly Miniatures page to see them all.

Plums in blue and white porcelain bowl with swallowtail Butterflies. Dutch inspired Still life painting by Rebecca Luncan
Plums, oil on copper, 5″ x 5″

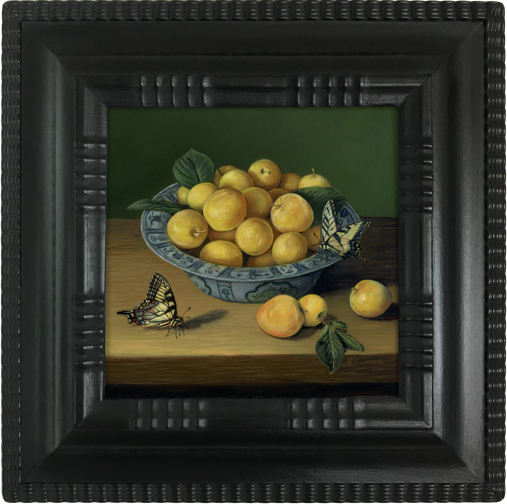
Handmade Dutch Ripple Frame

Each frame for this series of miniatures is hand made by Tom Matthews in New York. They feature carved ripples, made in the dutch tradion and take about a month to complete.

Busy as a Bee! How many layers does it take to make a painting?

Into the Country- Honey Bees, oil on copper by Rebecca Luncan

Into the Country- Honey Bees, oil on copper, 4″ x 4″

Making a painting, one layer at a time.

As a new mom, my time is more precious then ever. Over the last few months, I’ve been finding ways to use the big and small (more like small and smaller) chunks of time so I’m sure to use all of my art making time wisely. To do this, looking at all the steps one by one was very useful for me. The process of making a painting is different for every artist, and below you will find the steps it takes for me to compete a painting, from start to finish. Commissions are slightly different, and I’ll share the steps for one of those in a future post.

  1. Sketching out the idea. First I need to know what I’m going to be painting. I brainstorm ideas in my sketch book, do research, play with different approaches to the composition and try to get an overall sense of what I’m wanting to accomplish. This is my favorite way to use small blocks of time.
  2. Photo session. I work from photographs, so now’s the time to get some images to paint from. It helps to have a strong concept in mind before taking photos, but it’s equally important to stay flexible, and to be open to new ideas as they come. Sometimes it goes just as planned, but occasionally it takes two photo sessions to get what I’m looking for, or I may even go with a different concept entirely!
  3. Photo editing.  Because my paintings are so detailed, I like to work out bugs in the composition in this stage, rather than as I paint. My reference image can look pieced together, but as long as the composition is balanced and the lighting is more or less how I want it, then the reference image does its job. I rarely make any alterations to the composition after this stage. Having worked as a graphic designer, doing this on the computer is really quick and natural for me.
  4. Painting Support. Once I figure out what the size and shape of my painting will be, I cut out the shape in either copper or aluminum and lightly sand the side I will be painting.
  5. Under-drawing. I always do a fairly detailed drawing on the metal before I begin applying paint. Since I’m not using paints here, I can do this step anywhere, and I can stop and start anytime. My new routine for the small paintings is to do my underdrawing while nursing.
  6. Under-painting. And now we’re finally going to start painting! The first layer of paint can be applied in full color or monochromatic, depending on the painting. Check out some of my paintings in this first stage in the In Progress category of my blog. This layer is usually fairly quick, but it’s best to have at least an hour, even for a miniature. Larger paintings will need several hours. I like to finish the underpainting all at once.
  7. Second Layer. I was taught in art school that you should work on every section of the painting during each painting session. This is to keep continuity in the palette and level of detail. After years of painting, however, I’ve found that it works for me to break up painting sessions during the second layer: working on the background first, then middle ground, then foreground. I do like to get every area of the painting to the same level of finish before adding much detail in any one area, though.
  8. Third layer. This is where the magic happens. Things start to look how they’re supposed to, and my subjects begin to come alive. It’s really important to have a nice long painting session for this layer. A focused two hours is the minimum. For a large painting, those nine-hour painting days (I kind of remember those!) feel amazing. It’s good to step back and look at the painting often during this stage. Sometimes an area that felt resolved will need some changes after another area is more finished, and my third layer, begins to become a fourth. Two good tricks during this stage are to take a photo or look at the painting in a mirror. Any “somethings just not right” mysteries are much easier to solve with a new perspective.
  9. Final touches. Here I’ll add a little or a lot, depending on how well that third (or fourth) layer went. This is my chance to make sure all the areas of the painting are tied together in terms of color mixing and for level of finish. I usually do this with glazing which is a painting process of adding translucent layers of paint.
  10. Finished! That’s it, right? Nope. Now the painting needs to be signed, varnished, documented and framed. There! Now it’s finished.
See all of the “Into the Country” Miniatures in the series on the Monthly Miniature page