post

Taking photos of your dog for a pet portrait : Do’s and Don’ts

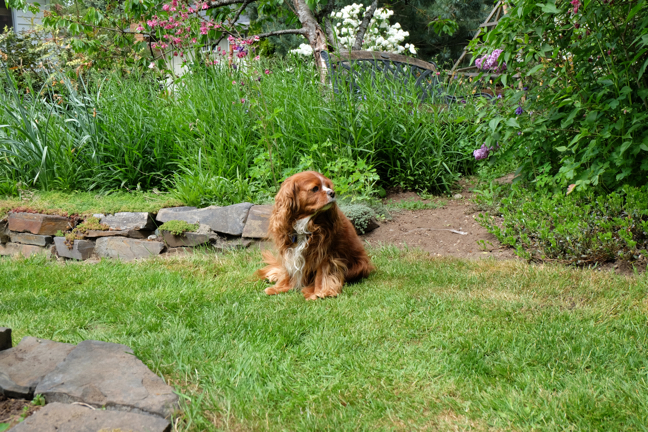
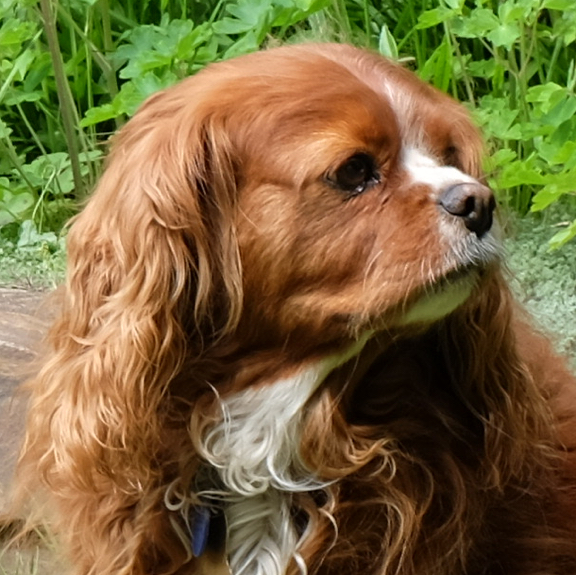
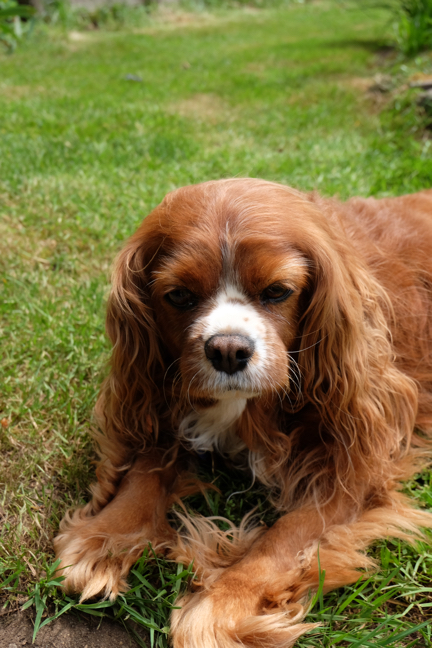
My King Charles Cavalier Spaniel, Mona, has posed for us to help demonstrate how to get the best photos for your pet portrait.

  1. Take photos outside.

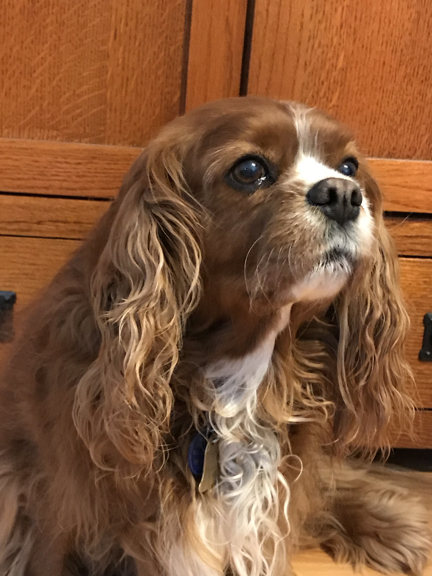
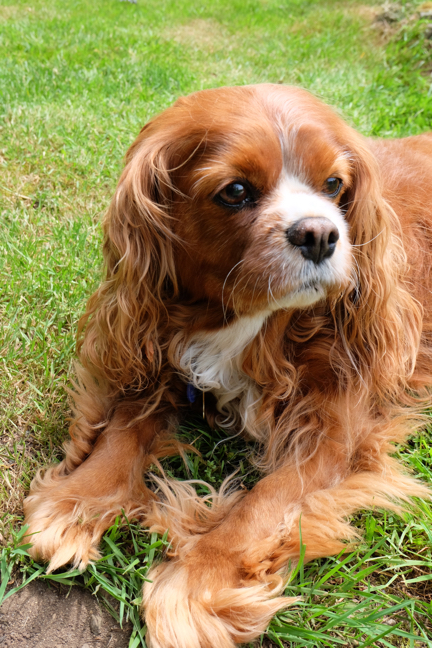
    Cloudy days are ideal and you can shoot at anytime during the day. If it’s sunny out, it’s best to plan to photograph around an hour after sunrise or an hour before sunset. Give yourself around 30 minutes for a photo session. The first image of Mona below is from a huge image file, but it’s a blurry image without a lot of detail because it was taken inside.

    photography don't for pet portrait

    Photo taken inside

    photos for a pet portrait painting

    Photo taken outside

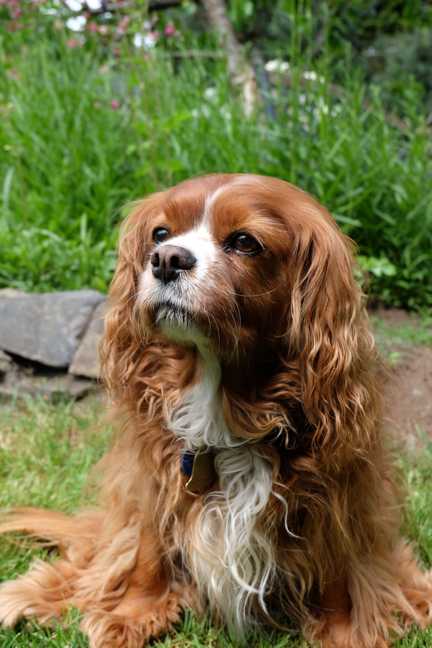
  2. Get on your pets level.

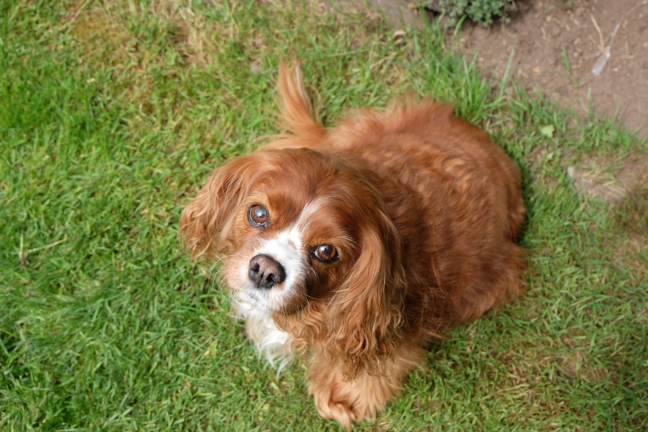
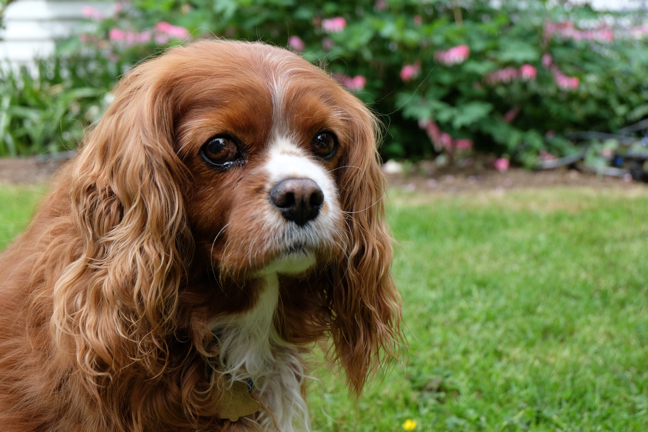
    Though my ten year old Mona does look awfully cute and puppy like in the first image below, images taken from above distort the body and feel kind of generic. I find images shot from closer to a dogs eye level feel more intimate and show a clearer picture of who your unique furry friend is.

    photography don't for pet portrait

    photographed from above

    photos for a pet portrait painting

    Image taken from Mona’s eye level

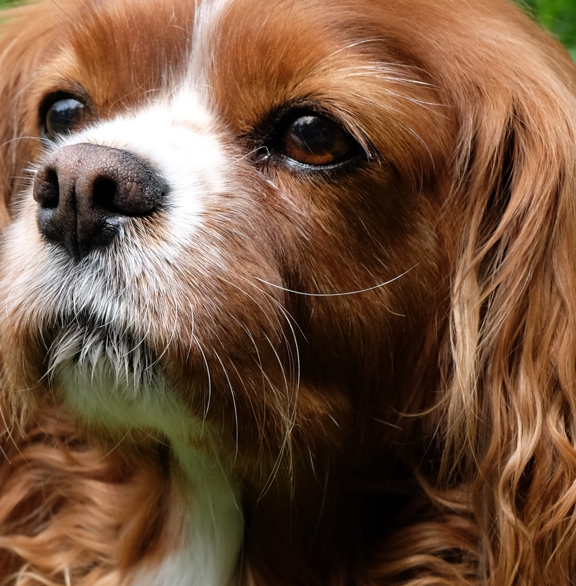
  3. Get up close.

    The first shot below looks great at first glance, but it’s shot from too far away. When zooming in on the face, you can see that the fine details are lost. Capturing the little details if part of what makes your portrait special and if the detail isn’t in the photo, I can’t paint it.

    Photo taken from far away

    photography don't for pet portrait

    Far away image zoomed in

    Photo taken up close

    photos for a pet portrait painting

    Up close image zoomed in

  4. Light up their eyes.

    A little light reflected in the eyes gives your pet a lively alert expression. Mona looks like she’s kind of sad or very sleepy without that light. Even on a cloudy day you should be able to get a reflection. If you’re having trouble, try to position the sun behind you.

    photography don't for pet portrait

    No reflection in the eyes

    photos for a pet portrait painting

    Reflection in Mona’s eyes

  5. Take lots of photos.

    When trying to get the perfect shot, I took over sixty images. Be patient and try lots of different angles. Block out 30 minutes to take photos and even if you feel like you got the perfect image 5 minutes in, keep shooting for the entire time.

  6. Get a helper.

    Not all dogs are as docile as Mona and having someone there with toys and treats helping pose your dog is a tremendous help.

  7. Bonus tip.

    Don’t forget to brush your dog’s hair! Mona had some tangles I missed before we took our photos. 😉

I look forward to seeing your images!! If you’re having trouble or if you’re unable to get new photos, contact me. Good luck!

Visit my Pet Portraits gallery to see some of my past pet portraits and see my tips for taking photos of your cat for a portrait. And now I’m going to have to make a portrait of Mona! Check back in a few months to see which image I end up choosing.

post

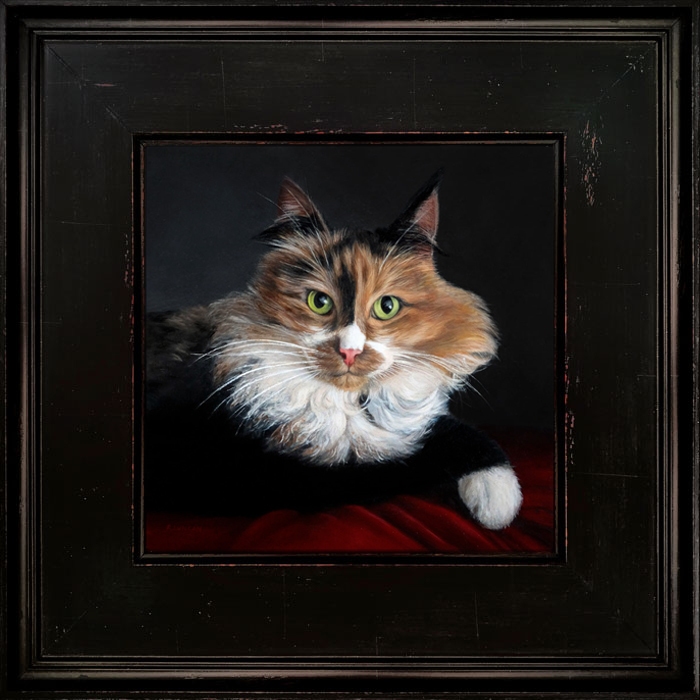
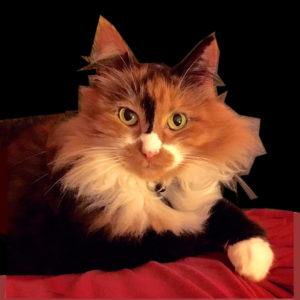
Lucy Reclining, getting the perfect images for a cat portrait painting

Most of my pet portrait commissions are made by referencing photos provided by my clients. I like to get a big range of images, not only to reference the painting, but also to get a sense of my subjects personality. Cats are notoriously difficult to photograph but getting the perfect images for a cat portrait painting is easier if you follow a few tips and have lots of patience. From these images, I pick the ones that inspire me the most and do a couple of mock-ups for the client to pick from. 

I have pulled some of the images from a recent commission of Lucy to help you get an idea of how to take photographs. Take a look at my tips below and if you have any questions about commissioning a portrait, feel free to contact me. 

1. Get on your cats level

Images for a cat portraitPhotographing your cat from a their eye level tends to make the image feel more intimate and it shows your cat without distortion. Cat’s do like to climb so you don’t always have to get down on the ground to achieve this.


2.Natural Light

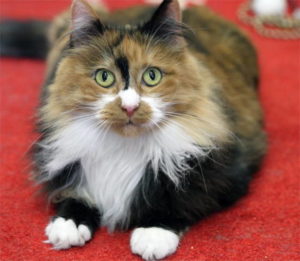
Images for a cat portraitNatural light is ideal and its best if the day is slightly overcast. Cats are usually indoor creatures, but steering them towards a window will achieve the desired effect. Not only does natural overcast light help avoid harsh shadows, it gives me a more accurate representation of color for the fur and eyes. Try to pose them so that they get the light to twinkle in their eyes for a lifelike appearance.


3. Hi Resolution / Fill the Frame

Images for a cat portraitHi resolution images are a must but if most of the picture is just background, I’m not going to get any detail (unless the landscape will be a part of the painting!). Never compress images before sending them and fill the frame with your cat as much as possible for the most detail. Getting the correct texture of your cats fur and the subtle color changes in the eyes is impossible if the image is blurry. Filling the frame with your cat gives me all of the details that are so fun to paint and to look at. Use the zoom feature on your camera to help you get close without attracting too much attention.


4. Take and send lots of images!

Primary reference image for composition

You can not send to many images for a cat portrait! Molly sent me dozens and it helped me get a sense of Lucy’s personality and get a feel for all of her different expressions. It also gave me flexibility in designing the composition that we chose for the painting. The primary reference image that inspired my portrait of “Reclining Lucy” didn’t fit any of the above suggestions. The client and I both loved how the pose and expression captured her so perfectly though. And since Molly sent me so many great images I was able to reference other images for accurate colors and fine details.


5. Help!

If you’re having trouble, getting someone to distract them helps you focus on photographing. Toys and treats can also be useful to get them to go and look where you want.

What a Mock-up looks like

Images for a cat portraitMy mock-up’s are constructed digitally and they help give a sense of what the painting will look like. This mock-up was submitted with the note that the color and fine details would be taken form another image (the one used to demonstrate “natural light” above).

For more information about commission, please visit the commissions page


From Molly:

We got the box today!  OMG, I absolutely love Lucy

Busy as a Bee! How many layers does it take to make a painting?

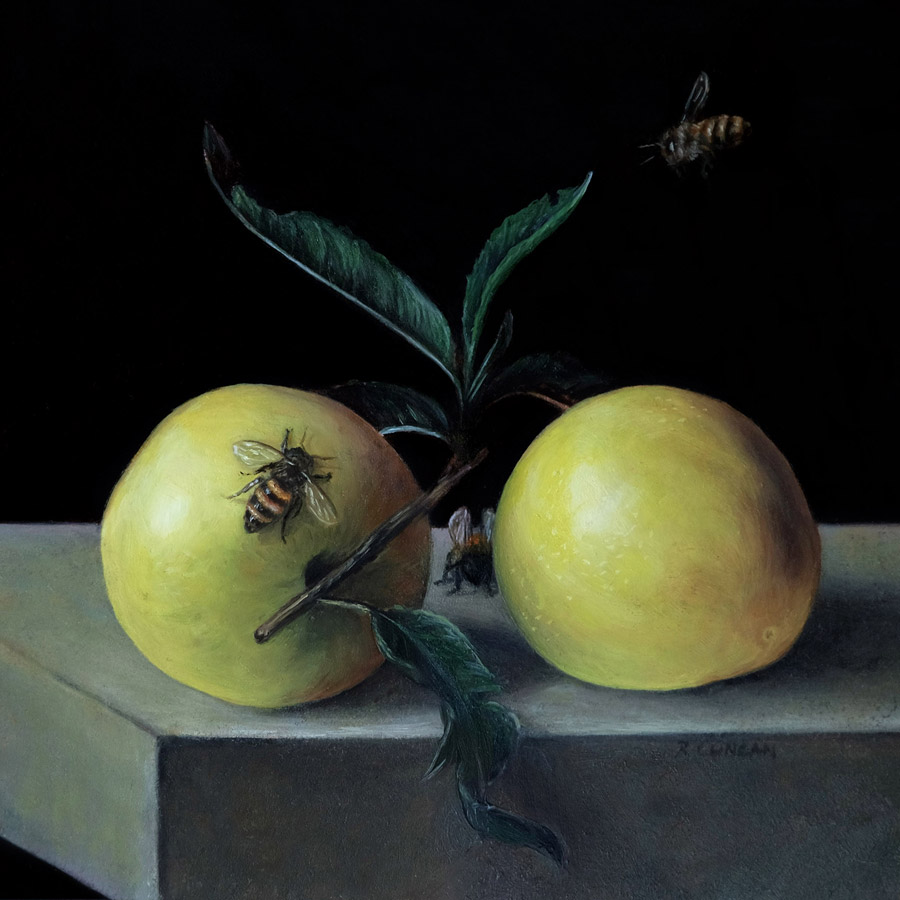
Into the Country- Honey Bees, oil on copper by Rebecca Luncan

Into the Country- Honey Bees, oil on copper, 4″ x 4″

Making a painting, one layer at a time.

As a new mom, my time is more precious then ever. Over the last few months, I’ve been finding ways to use the big and small (more like small and smaller) chunks of time so I’m sure to use all of my art making time wisely. To do this, looking at all the steps one by one was very useful for me. The process of making a painting is different for every artist, and below you will find the steps it takes for me to compete a painting, from start to finish. Commissions are slightly different, and I’ll share the steps for one of those in a future post.

  1. Sketching out the idea. First I need to know what I’m going to be painting. I brainstorm ideas in my sketch book, do research, play with different approaches to the composition and try to get an overall sense of what I’m wanting to accomplish. This is my favorite way to use small blocks of time.
  2. Photo session. I work from photographs, so now’s the time to get some images to paint from. It helps to have a strong concept in mind before taking photos, but it’s equally important to stay flexible, and to be open to new ideas as they come. Sometimes it goes just as planned, but occasionally it takes two photo sessions to get what I’m looking for, or I may even go with a different concept entirely!
  3. Photo editing.  Because my paintings are so detailed, I like to work out bugs in the composition in this stage, rather than as I paint. My reference image can look pieced together, but as long as the composition is balanced and the lighting is more or less how I want it, then the reference image does its job. I rarely make any alterations to the composition after this stage. Having worked as a graphic designer, doing this on the computer is really quick and natural for me.
  4. Painting Support. Once I figure out what the size and shape of my painting will be, I cut out the shape in either copper or aluminum and lightly sand the side I will be painting.
  5. Under-drawing. I always do a fairly detailed drawing on the metal before I begin applying paint. Since I’m not using paints here, I can do this step anywhere, and I can stop and start anytime. My new routine for the small paintings is to do my underdrawing while nursing.
  6. Under-painting. And now we’re finally going to start painting! The first layer of paint can be applied in full color or monochromatic, depending on the painting. Check out some of my paintings in this first stage in the In Progress category of my blog. This layer is usually fairly quick, but it’s best to have at least an hour, even for a miniature. Larger paintings will need several hours. I like to finish the underpainting all at once.
  7. Second Layer. I was taught in art school that you should work on every section of the painting during each painting session. This is to keep continuity in the palette and level of detail. After years of painting, however, I’ve found that it works for me to break up painting sessions during the second layer: working on the background first, then middle ground, then foreground. I do like to get every area of the painting to the same level of finish before adding much detail in any one area, though.
  8. Third layer. This is where the magic happens. Things start to look how they’re supposed to, and my subjects begin to come alive. It’s really important to have a nice long painting session for this layer. A focused two hours is the minimum. For a large painting, those nine-hour painting days (I kind of remember those!) feel amazing. It’s good to step back and look at the painting often during this stage. Sometimes an area that felt resolved will need some changes after another area is more finished, and my third layer, begins to become a fourth. Two good tricks during this stage are to take a photo or look at the painting in a mirror. Any “somethings just not right” mysteries are much easier to solve with a new perspective.
  9. Final touches. Here I’ll add a little or a lot, depending on how well that third (or fourth) layer went. This is my chance to make sure all the areas of the painting are tied together in terms of color mixing and for level of finish. I usually do this with glazing which is a painting process of adding translucent layers of paint.
  10. Finished! That’s it, right? Nope. Now the painting needs to be signed, varnished, documented and framed. There! Now it’s finished.
See all of the “Into the Country” Miniatures in the series on the Monthly Miniature page

Packing November’s Reclining Rabbit Painting for her Cross Country Journey

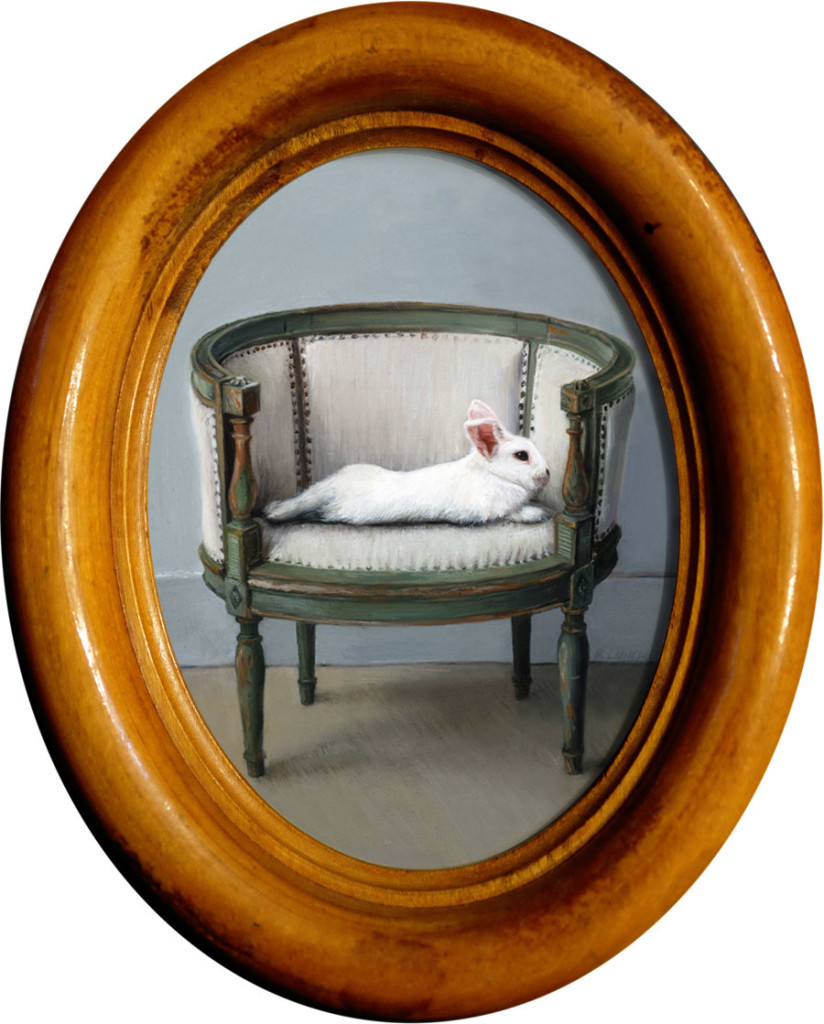
Reclining Rabbit oil painting miniature by Rebecca Luncan

Reclining Rabbit – November 2015, oil on aluminum, 4.25″ x 3.25″

I’m a huge fan of miniature artwork, and the ease and affordability of shipping them safely is one reason why.

Miniature paintings are great for so many reasons. They are intimate and powerful, easy to hang in any house, and much more affordable to commission than larger works (even with a custom, hand-finished frame).

And while miniature paintings are cheaper and easier to ship than larger artwork, they also need some special treatment.

Medium-sized paintings typically ship wrapped in plastic and 2″ of bubble wrap surrounded in a cardboard exterior . That will normally be enough for small miniatures as well, but because the packages are small, they are more likely to get tossed around, stacked, and generally treated roughly.

Years of working in a museum have trained me to go the extra mile in prepping artwork for shipping.

Here’s how I packaged this miniature painting to ship across the country to her new home.

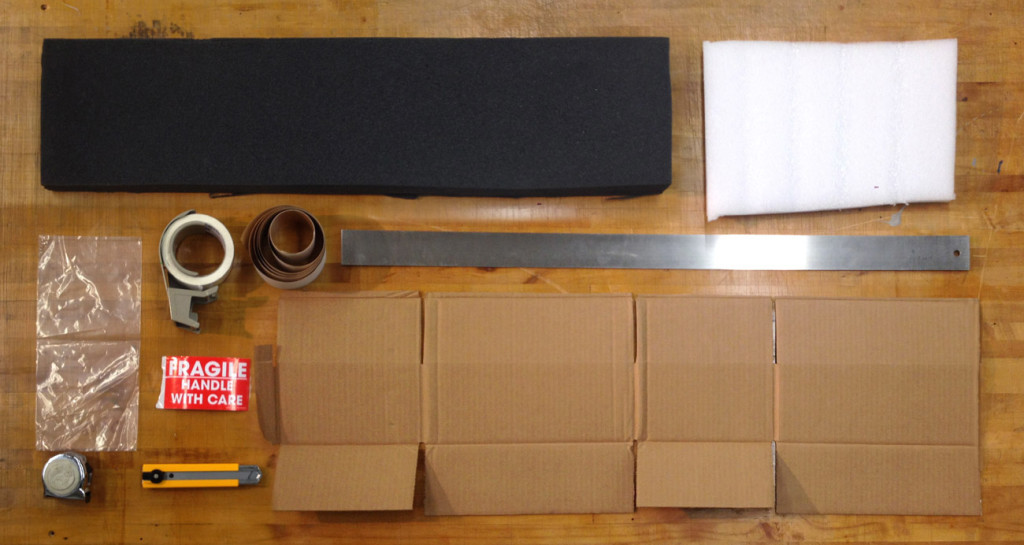
Art packing materials

Art packing materials

Materials

  • 2.25″ grey foam *sub wadded brown paper for more environmentally friendly packing
  • Ethafoam (Styrofoam can also be used) the thickness of the artwork (you can glue multiple layers together)
  • plastic bag (polyethylene or food grade)
  • tape measure
  • packing tape
  • straight edge
  • “fragile” sticker
  • utility knife (I like Olfa)
  • cardboard (box)

Step-by-Step

  1. Determine what size box is needed. Measure the painting and add 4″ to get the length and width. Stack your grey foam, Ethafoam and one layer of cardboard, then measure to get your box’s ideal height. *I’ve been subbing brown paper for the grey foam more recently to make my packing materials more environmentally friendly. If you do this, leave two inches of space for both above and below your artwork and use double thick cardboard. Add a second layer of cardboard under your artwork.
  2. Find or cut out the box. A box that is within a few inches (but at least 2″ larger on all sides)

    of the painting is ideal. The height should be trimmed to fit the height of the foam exactly. If you don’t have a box handy, you can make your own: the image above shows how you would cut a box from a flat piece of cardboard. To get the creases for the bends, use a bone scorer or completely retract the blade on the utility knife and use the (dull) metal edge. Tape the bottom of the box together.

  3. Cut each piece of foam and cardboard to fit. I also like to take out a corner notch in the top layers to make unpacking a little easier. My favorite knife is the Olfa utility knife with a 25mm blade. Fantastic knife for cutting foam (and everything else). Make sure to keep your fingers out of the way of the blade, these knives are incredibly sharp!

  4. Cut a hole in the Ethafoam that will snugly fit the painting.
  5. Wrap the painting in plastic, making sure to seal the

    edges completely and that the surface of the painting does not come into contact with the plastic. If the painting is unframed and very dry, wrap

    with Dartek first, then plastic.

  6. Phew! Everything’s cut and now it’s time to put it all together.
Packing miniature paintings, step by step

Packing miniature paintings, step by step

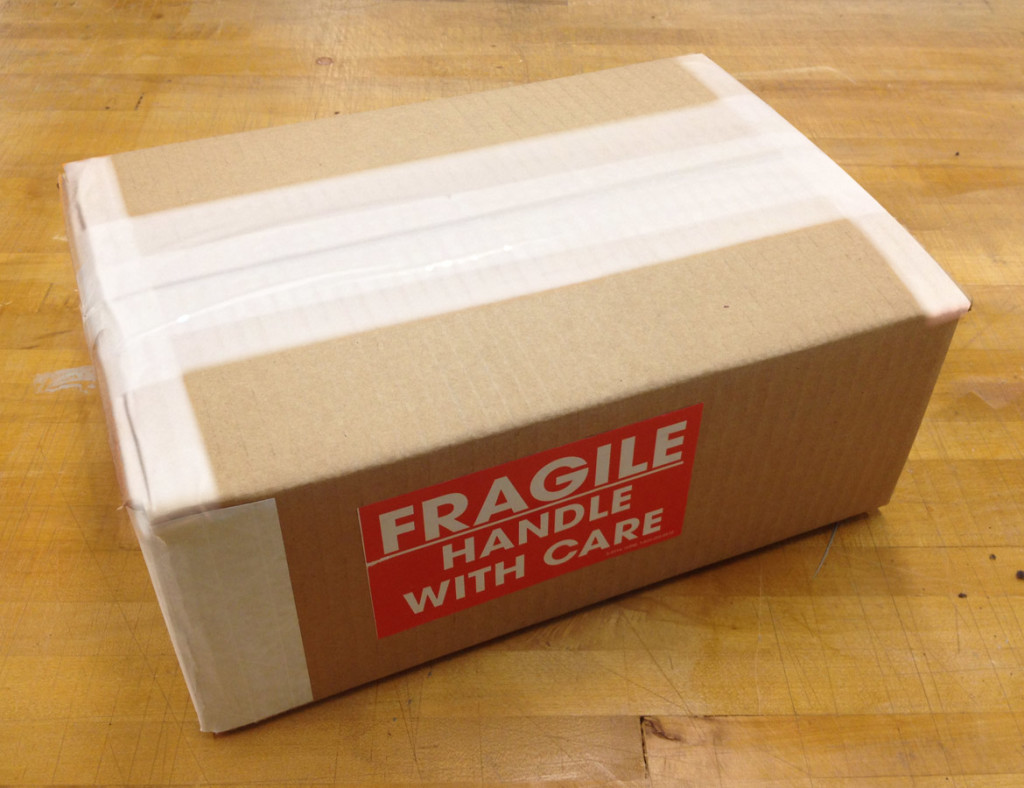
7. Remember to add the packing slip and a thank you note, then say your goodbyes and seal it all up. Make it official with a fragile sticker, and it’s ready to post out to it’s new home!

Ship-Finished

If you’re interested in receiving your very own hand painted miniature, contact the artist to commission one just for you or sign up for the monthly newsletter for a preview of the newest painting up for sale!

post

Antique Frame Transformed for the August Monthly Miniature with French Polish

The discovery and restoration of a meticulously crafted, one hundred year old frame for Charlemagne in Profile

My sister is passionate about antiques. Most weekends will find her traveling to different auctions, estate sales, and antique shops, on the hunt for something unusual that catches her imagination. About a year ago, she called me up, excited about a sale of wooden frames produced by the The Castner Picture Frame Company in the early 1900’s. The company meticulously produced frames from scratch for more than a century before shutting down. The Mohawk Building in Cincinnati was left with thousands of uniquely designed frames ranging drastically in size and level of detailing. Wooden frames aren’t a rarity, but wooden miniature frames most certainly are, and here they had them them in abundance!

We excitedly talked on the phone and texted back and forth as the date of the sale approached, and she ended up buying around 60 small frames. I was mostly interested in small circular frames, but thankfully, she couldn’t pass up some beautiful wooden ovals as well. Most of the ovals are unfinished, while the circular frames are almost all primed for painting or gilding. What a rare opportunity! They clean up beautifully, and I’ve treasured each one as I painted or polished it to fit portraits of people and rabbits.

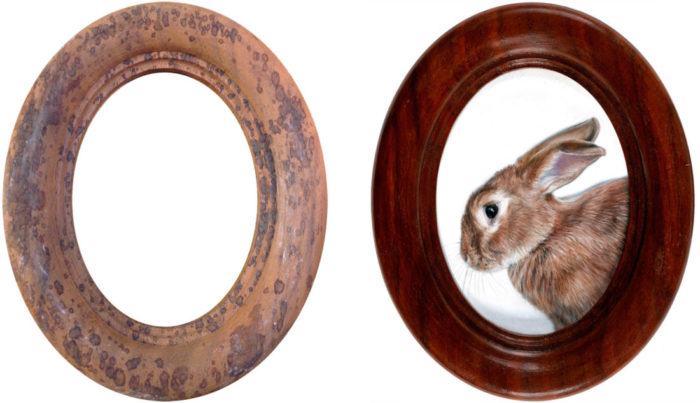
All of the rabbit monthly miniatures are framed in one of these frames, but I chose to highlight this one in particular because the transformation was so dramatic. It was so dirty and covered in mysterious spots that I had little hope in finishing it, but as I worked, the spots disappeared, and the grain became richer and more beautiful with each step of the process. It’s my favorite so far, and I chose to use if for this minimal painting of Charlie, the simple white background allowing the frame to shine.

French Polish: Step-by-step

French polishing is a technique of finishing wood with shellac as the main ingredient. This technique was popular in the late 1800’s for furniture but it is often overlooked in contemporary furniture finishing due to it’s low resistance to damage from water and heat as well as its labor intensive application process. It is still a favorite for musical instruments because of it’s unique ability to be be applied effectively in extremely thin coats leaves musical instruments with a nice clear sound. Many fine woodworkers also continue to use it, especially on antiques because the rich depth of the finish is difficult to rival with modern materials. As my frames shouldn’t come into contact with either heat or water, it’s an ideal finishing process for me.

Materials

  • shellac*
  • pumice
  • Renaissance  wax
  • denatured alcohol
  • cotton batting (or cotton balls)
  • soft cloth or cheesecloth
  • sandpaper (280, 320, 400 and 600 grit)
  • 2 cheap 1″ – 2″  brushes
  • walnut or olive oil
  • dust mask

*I’m using a premixed solution but you can buy shellac flakes and dissolve it yourself

Step One: Clean

Clean the surface with denatured alcohol and a soft cloth.

Step Two: Sand

Sand the frame with progressively finer grits of sandpaper (starting with 280 and progressing to 600).

Step Three: Rub with Alcohol & Pumice

Make a fad by wrapping your soft cloth or cheesecloth around a wad of cotton that has soaked in alcohol. You can now sprinkle a bit of pumice on the frame, making sure to wear your dust mask. Rub the frame vigorously with the fad, and if it starts to catch on the grain, add a drop of oil.

Step Four: Rub with Shellac

Make a new, second fad, this time soaking in shellac instead of alcohol, and again rub vigorously with as random a pattern as possible. Reapply shellac to the inside of the fad (by dipping the cotton ball) as needed.

Step Five: Repeat, then Dry

Repeat steps three and four a few times, letting it dry for several hours between coats. Pay careful attention that you don’t get too much shellac building up on ridges and valleys of the frame, as you will want these details to stand out. The process of working the abrasive pumice and shellac alternately is called the “British Method” of French polishing. The alternative, using both the shellac and abrasive at the same time is the original, or “French Method”.

Let dry overnight.

Step Six: Final Rub with Alcohol

Make a new fad using just alcohol, and gently glide it over the surface. You want to remove any oil that may be on the surface and even out the final coat of shellac. Don’t press so hard that you begin removing the shellac, however. At this point, the frame just glows, and it’s hard to stop touching the silky-smooth surface. But stop touching for now, and leave it overnight.

Step Seven: Wax and Buff

Brush on a very very thin coat of Renaissance wax. Let it dry for 10 minutes, then buff it off with a clean cloth or a stiff brush. Give it another 24 hours to dry and your frame is finished! Now you can touch it.

Finishing miniature frames

Shellac: Yes, it’s made from bugs!

The critical material for a french polish is shellac. Made from lac, an amber colored resinous material produced by the female Kerria lacca insect, which forms a tunnel around the insect and serves as a kind of cocoon to incubate the eggs she lays. Shellac is a non-toxic material that’s even rated as food-safe by the FDA and has a plethora of wide-ranging uses. Not only to be found in furniture, it can also be found on your jelly beans, guitar, and in nail polish. It’s relatively easy to harvest by scraping it off the bark of the trees, and refining can simply be done by heating it over a fire then filtering once it liquefies to remove any stray insects or bits of bark. It has been used for centuries to polish furniture in the native countries of these insects, Thailand and India. The french polishing technique, which became prominent in the 18th century, is still commonly used to polish furniture and musical instruments throughout the world today.
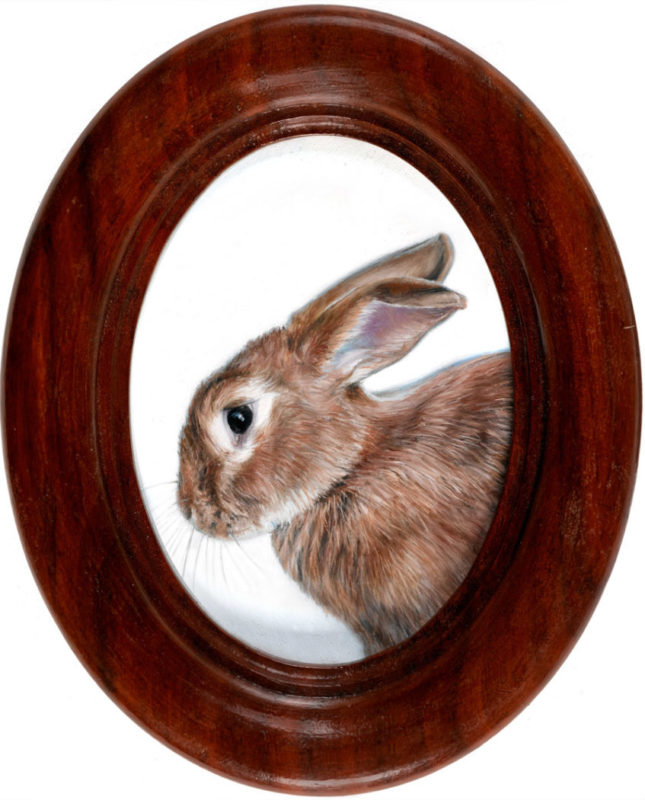
Rabbit oil painting miniature by Rebecca Luncan

Charliemagne in Porfile
oil on aluminum
3.75″ x 2.75″