Packing November’s Reclining Rabbit Painting for her Cross Country Journey

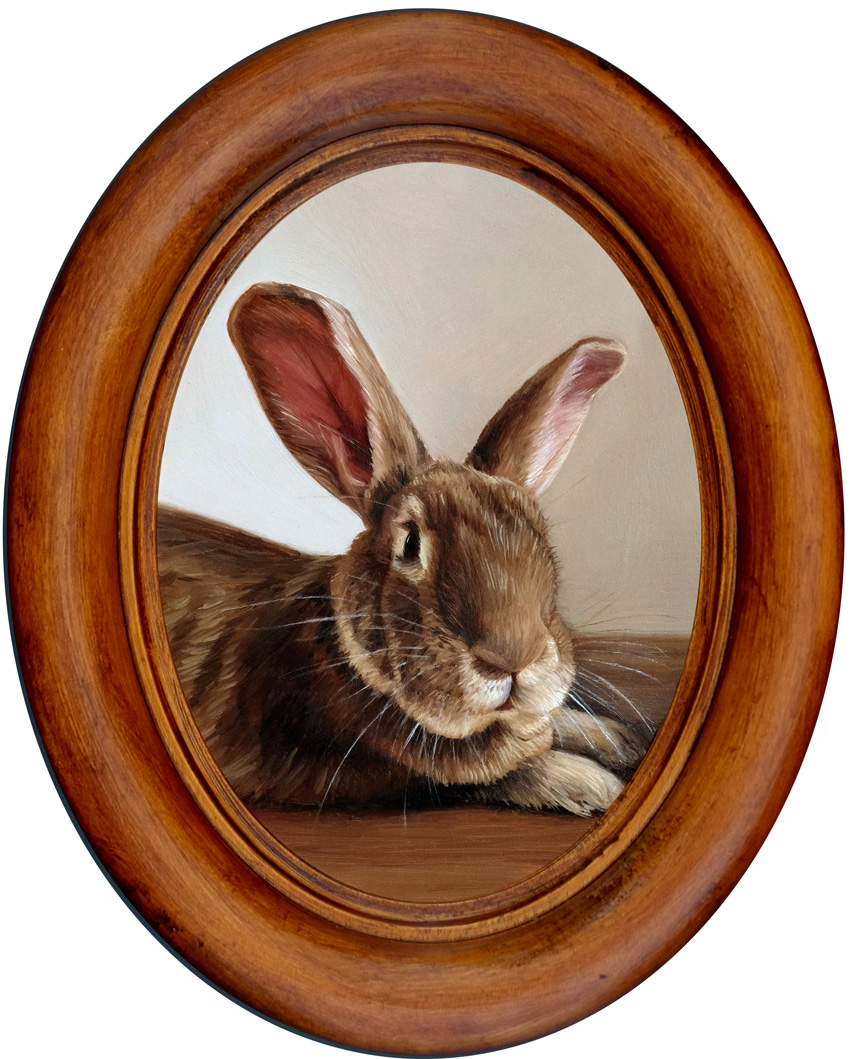
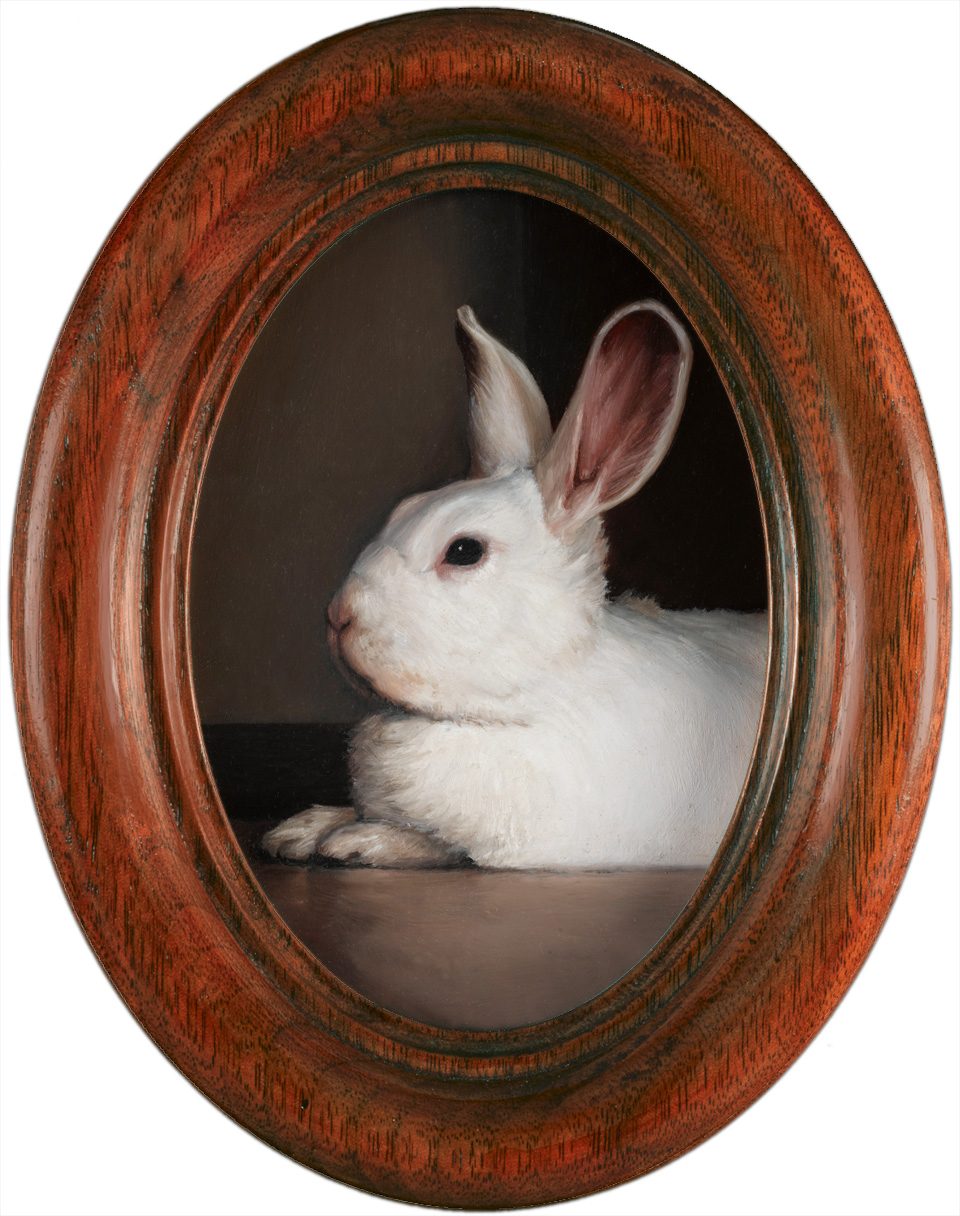
Reclining Rabbit oil painting miniature by Rebecca Luncan

Reclining Rabbit – November 2015, oil on aluminum, 4.25″ x 3.25″

I’m a huge fan of miniature artwork, and the ease and affordability of shipping them safely is one reason why.

Miniature paintings are great for so many reasons. They are intimate and powerful, easy to hang in any house, and much more affordable to commission than larger works (even with a custom, hand-finished frame).

And while miniature paintings are cheaper and easier to ship than larger artwork, they also need some special treatment.

Medium-sized paintings typically ship wrapped in plastic and 2″ of bubble wrap surrounded in a cardboard exterior . That will normally be enough for small miniatures as well, but because the packages are small, they are more likely to get tossed around, stacked, and generally treated roughly.

Years of working in a museum have trained me to go the extra mile in prepping artwork for shipping.

Here’s how I packaged this miniature painting to ship across the country to her new home.

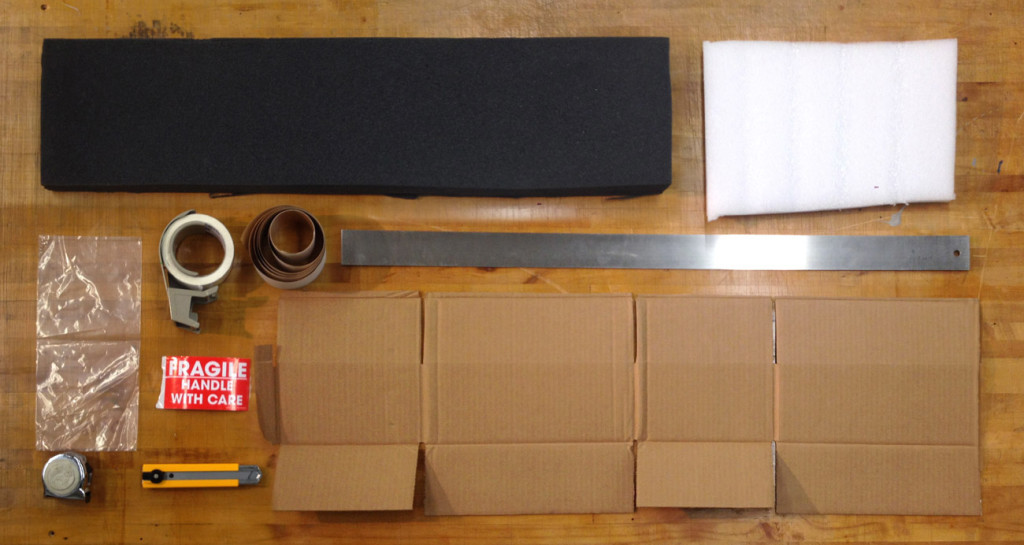
Art packing materials

Art packing materials

Materials

  • 2.25″ grey foam *sub wadded brown paper for more environmentally friendly packing
  • Ethafoam (Styrofoam can also be used) the thickness of the artwork (you can glue multiple layers together)
  • plastic bag (polyethylene or food grade)
  • tape measure
  • packing tape
  • straight edge
  • “fragile” sticker
  • utility knife (I like Olfa)
  • cardboard (box)

Step-by-Step

  1. Determine what size box is needed. Measure the painting and add 4″ to get the length and width. Stack your grey foam, Ethafoam and one layer of cardboard, then measure to get your box’s ideal height. *I’ve been subbing brown paper for the grey foam more recently to make my packing materials more environmentally friendly. If you do this, leave two inches of space for both above and below your artwork and use double thick cardboard. Add a second layer of cardboard under your artwork.
  2. Find or cut out the box. A box that is within a few inches (but at least 2″ larger on all sides)

    of the painting is ideal. The height should be trimmed to fit the height of the foam exactly. If you don’t have a box handy, you can make your own: the image above shows how you would cut a box from a flat piece of cardboard. To get the creases for the bends, use a bone scorer or completely retract the blade on the utility knife and use the (dull) metal edge. Tape the bottom of the box together.

  3. Cut each piece of foam and cardboard to fit. I also like to take out a corner notch in the top layers to make unpacking a little easier. My favorite knife is the Olfa utility knife with a 25mm blade. Fantastic knife for cutting foam (and everything else). Make sure to keep your fingers out of the way of the blade, these knives are incredibly sharp!

  4. Cut a hole in the Ethafoam that will snugly fit the painting.
  5. Wrap the painting in plastic, making sure to seal the

    edges completely and that the surface of the painting does not come into contact with the plastic. If the painting is unframed and very dry, wrap

    with Dartek first, then plastic.

  6. Phew! Everything’s cut and now it’s time to put it all together.
Packing miniature paintings, step by step

Packing miniature paintings, step by step

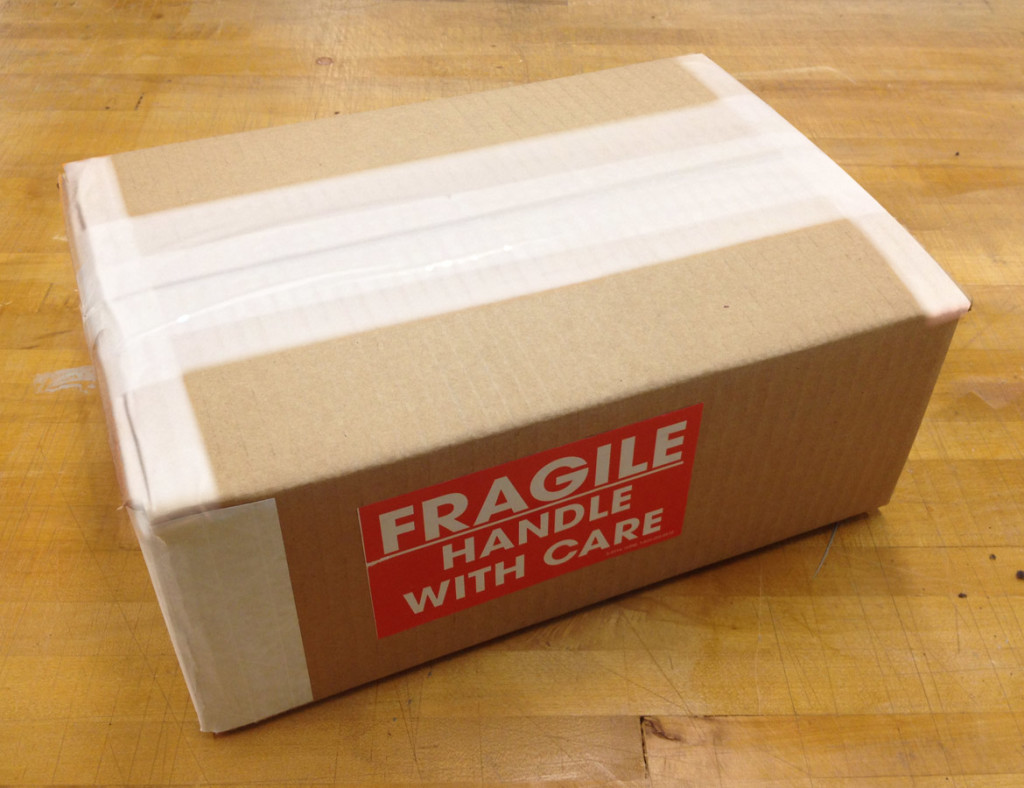
7. Remember to add the packing slip and a thank you note, then say your goodbyes and seal it all up. Make it official with a fragile sticker, and it’s ready to post out to it’s new home!

Ship-Finished

If you’re interested in receiving your very own hand painted miniature, contact the artist to commission one just for you or sign up for the monthly newsletter for a preview of the newest painting up for sale!
September Miniature Painting, Life with Rabbits in the Studio

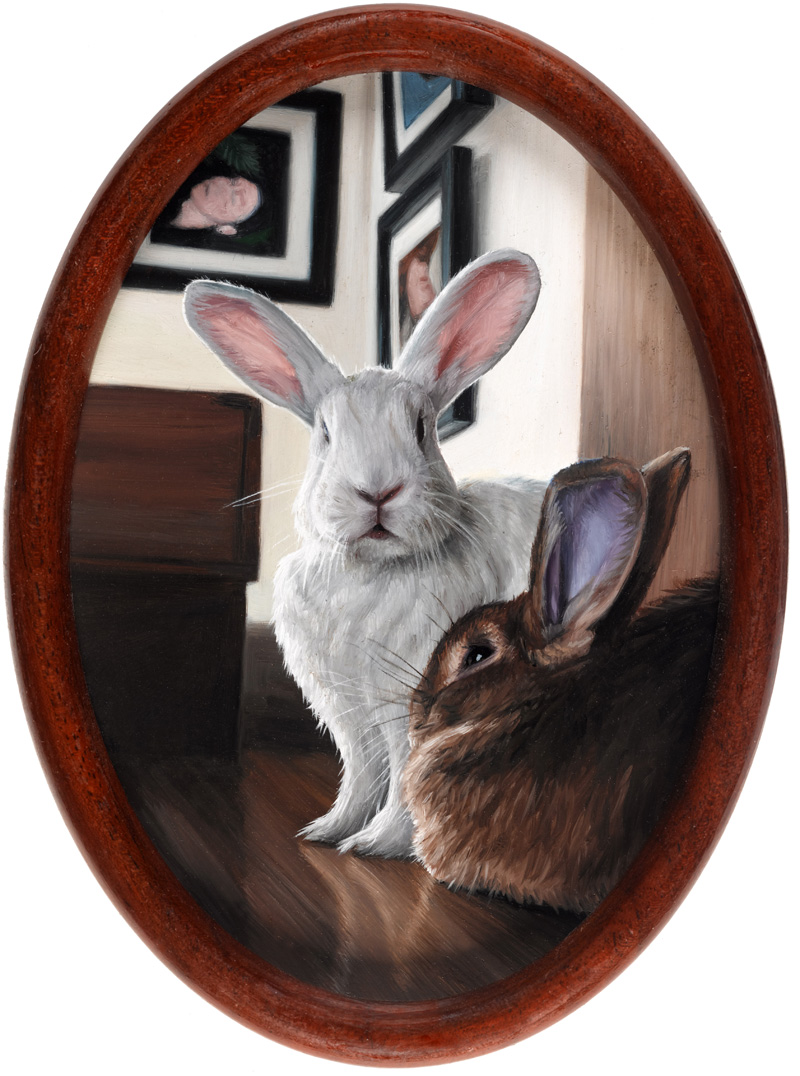
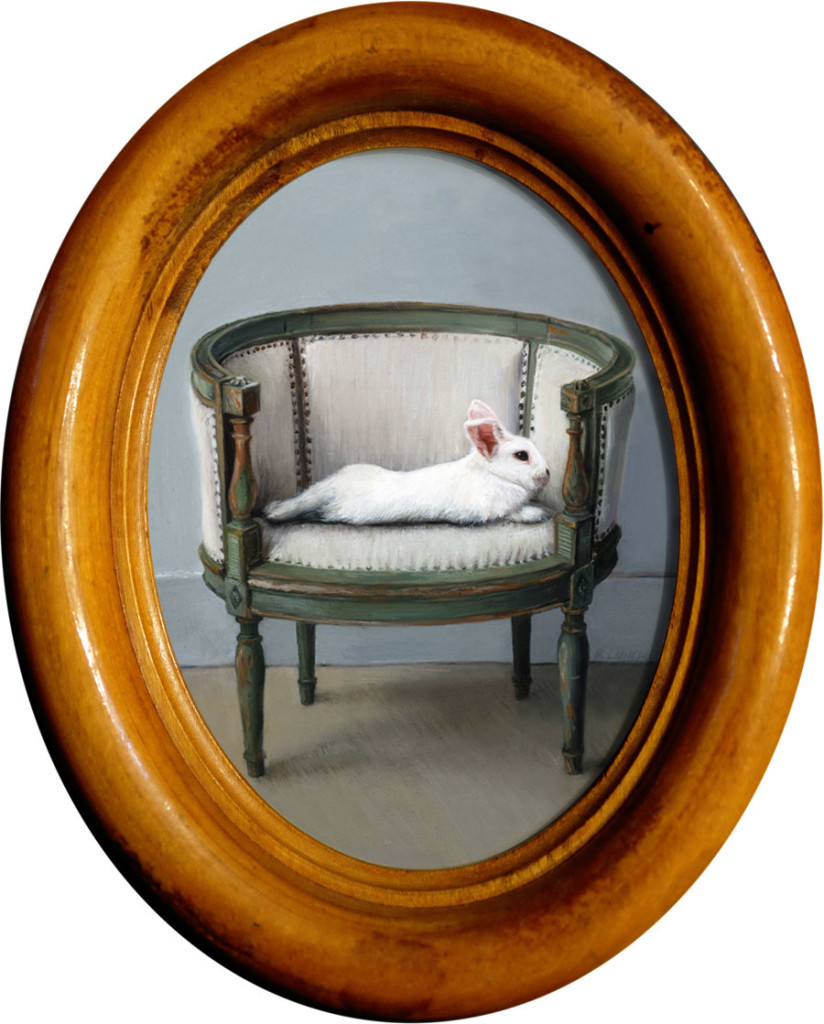
Studio Rabbits, oil painting by Rebecca Luncan

Studio Rabbits – September 2015, oil on aluminum, 5.25″ x 3.75″

A glimpse into the artist’s studio, halfway through the “Monthly Miniature – Rabbits” series

I live on a quarter acre just north of Seattle and this is where you’ll find my studio, in a converted garage at my house. I love having company in the studio while I paint, and some of that company is very furry. My dog Mona curls up neatly behind me and keeps me warm (it can get chilly in Seattle), and rabbits Charlie and Ellie lie on the rug at my feet. It’s a good thing I wear grubby painting clothes anyway, because the rabbits nip at my pant legs to remind me when it’s dinner time. There are plants and birds to see out windows on two sides. Today there are stellar jays feeding on sunflowers.

Though they have the run of the house, the rabbits spend most of their time in the studio. When not under my desk, Ellie naps in her favorite blue chair. Charlie likes to flop on his side on a rug near the wall. And they both like to sit in the windowsill looking out. I love when I’m picking strawberries in the front yard, and I hear people walking by exclaiming, “Oh my gosh, there’s a rabbit in the window!” Sometimes I open the back door and let them roam the yard, but Ellie has become a cunning escape artist, so they’re on house arrest until the yard is better secured. It would also help if the neighbor behind us could resist tempting them with carrot treats.

At 17′ x 24′ it’s a big space for someone working so small, but it’s very full of framing supplies and tools, painting and drawing supplies, lots of art books, and printers. The walls are lined with finished paintings and works in progress. I usually have around six paintings at various stages of completion, in addition to handpicked frames and prepared metal surfaces for at least 20 more. In this month’s “Studio Rabbits” painting, you can see three paintings from my “Open, Closed, Away” series hanging in the background.

I finally convinced my soon-to-be husband (and editor, web developer and photographer) to move his office from a spare room to a corner of the space in here. It’s a big room, and he doesn’t seem to mind having a giant mat/glass cutter mounted to the wall in his area. So far it has been working great, but I hope we’ll be able to keep it warm enough in the winter. My little space heater can only do so much! But we’ll figure that out when the time comes. The bottom of his pants are as yet mostly intact. (There’s a cozy rug under my desk, and I give them more treats.)


Phthalo: the Forbidden Blue (July Monthly Miniature)

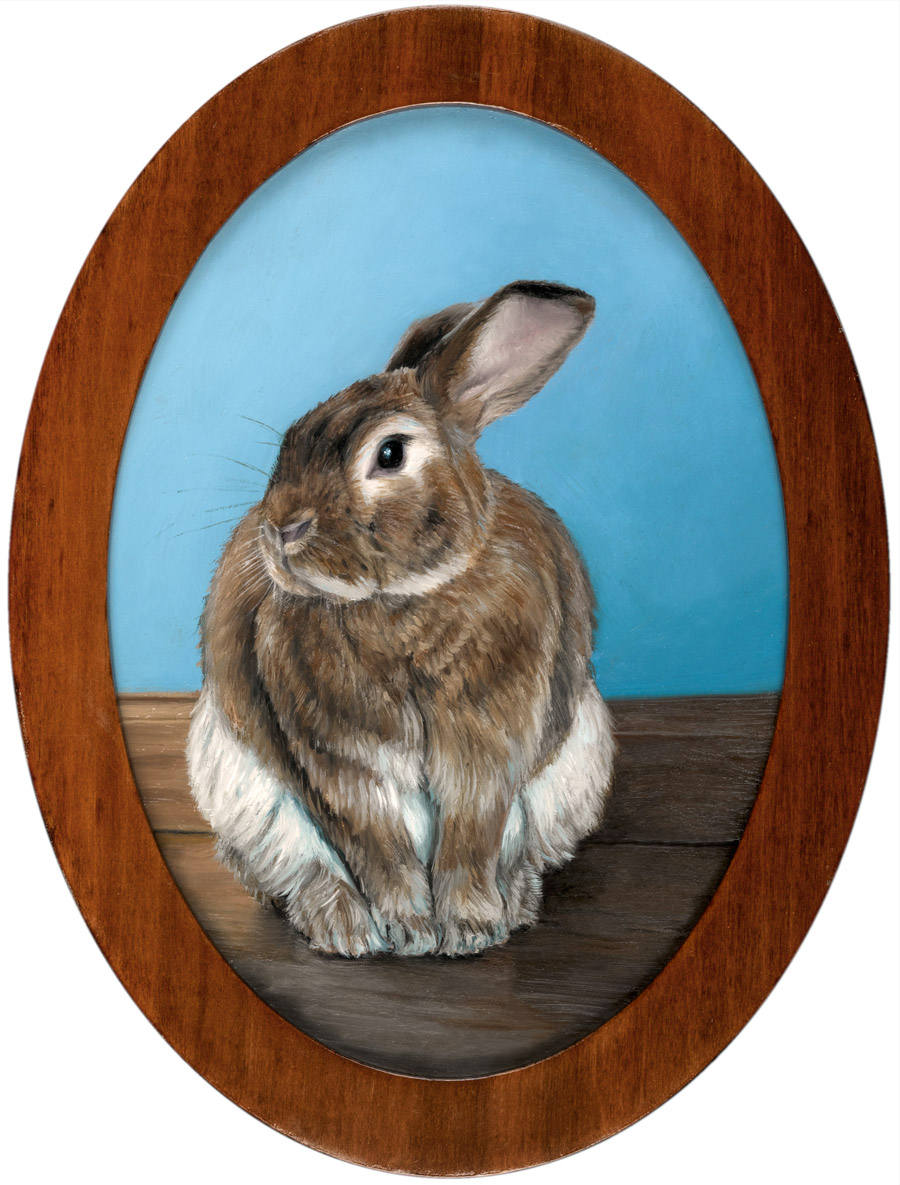
Rabbit Painting Miniature Rebecca Luncan

My fourth Monthly Miniature is featured with a phthalo blue background, a color long excluded from my palette.

How embarrassing that I was afraid of a tube of paint. I like to think of myself as not really afraid of anything, but I gave my last tube of phthalo blue away many years ago because I was afraid it would invade my paintings.

Phthalo blue is a relatively new pigment, accidentally discovered and rediscovered in the lab before its potential was finally recognized by the company Scottish Dyes in the early 1900’s. It was introduced as an artist pigment in the mid 1930’s and has been highly valued ever since for it’s resistance to fading, intense color, and high tinting strength.

That high tinting strength is the source of my fears. You have to understand how invasive phthalo blue is: during the course of a painting, hues naturally blend and migrate. While most pigments can be blended into entirely new colors, either dominating and being dominated by other hues, phthalo blue tints so powerfully that it is extremely difficult to blend away in that manner. If it’s on the pallet, I can see it in the painting everywhere! Typically as a figurative painter, creating warm skin tones helps give the person a more vibrant, lively feel, so my general rule has been to only use Cobalt Blue (which has a weak tinting strength) so that the warm tones are easy to pull forward with a greater sense of control. Whereas a tiny bit of phthalo blue on the pallet has a way of invading everything and can quickly force you to scrape your entire palette clean and start again, thus the expulsion of the color from my studio.

Two paintings changed my perspective, and now I can’t imagine working without it.

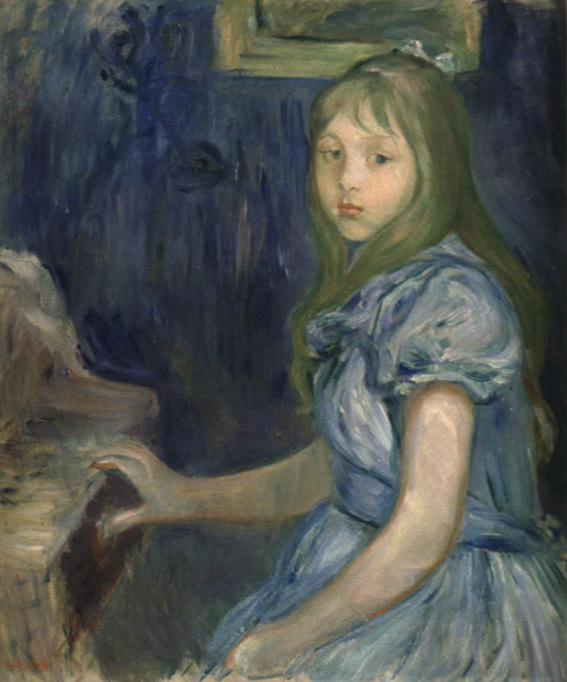
I spend a great deal of time at the Seattle Art Museum, where I help create mounts that stabilize objects on display and mitigate earthquake risk. And though I’m mostly working with sculptural pieces, I love spending time with the paintings. March of 2014 brought “France: Inside and Out“, an ongoing show in the fourth floor galleries (co-curated by Chiyo Ishikawa and Julie Emerson), and though the portrait below was painted before the advent of phthalo blue, it started me questioning my fear of a dominating cool pigment in a portrait. The blue is everywhere in this painting: the frame, the hair, and the skin, not to mention the blue dress and background. But at the same time, it’s neither monochromatic nor muddy. This painting planted the thought that maybe it’s okay to let go of some control and let the paint surprise me.

Berthe Morisot, Lucie Léon at the Piano, oil on canvas, 1892 Collection of the Seattle Art Museum

Berthe Morisot, Lucie Léon at the Piano, oil on canvas, 1892 Collection of the Seattle Art Museum

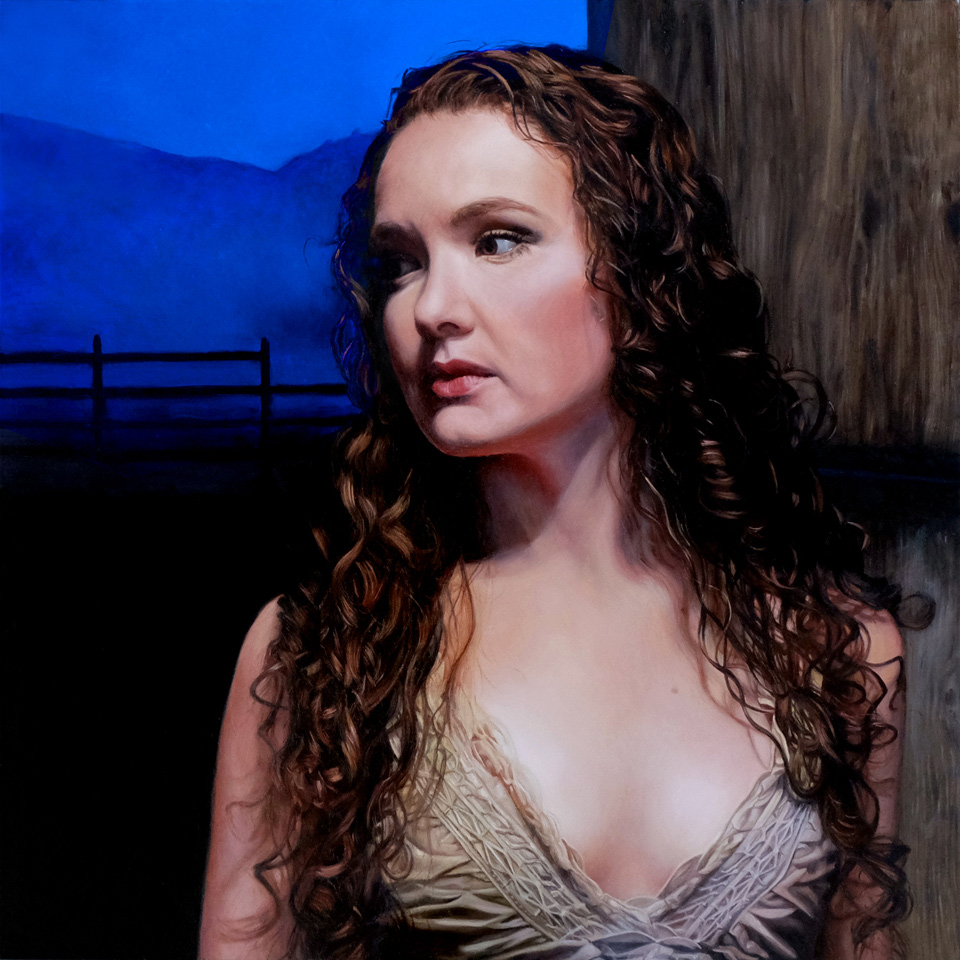
That planted thought found unexpectedly fertile ground this February, when my partner Evan and I showed up at his sister Molly’s small farm in Arlington, WA just before dusk. I wanted to begin a series that actively connected the figure and landscape, and we had come to gather images. The winter fog rolled into the valley, across the fields, and all around the trees, barns, and all of us. The sun had begun to set, turning the foggy hills a deep and vibrant blue, and mysterious lights haunted in the distance. As a subject, Molly is as dramatic as the background that evening, and as we finished, I couldn’t wait to begin the new series.

But as I began to paint, I tried blue after blue but none of them worked. Nothing came close to the shockingly blue sky we had witnessed. I finally conceded that I needed phthalo blue, and I bought my first tube of it in over 10 years. It delivered where other blues had fallen short, and although I only used it in the background in this painting, it helped me shake off some of my longtime inhibitions. In my fourth Monthly Miniature, I also used phthalo blue, and if you look closely, I have used it much more freely, adding it to the floor and the figure. Adding it in the highlights in Charlie’s soft belly fur was truly freeing and a moment of joy. Instead of fearing the phthalo invasion, I invited it in and listened to what it had to say. I’m pleased to say it had some nice ideas, and we’ll be working together again soon.

Portrait oil painting Rebecca Luncan

Vigil, Oil on Aluminum panel, 15″ x 15″, 2015

Follow the White Rabbit! June Monthly Miniature and my Social Media Journey

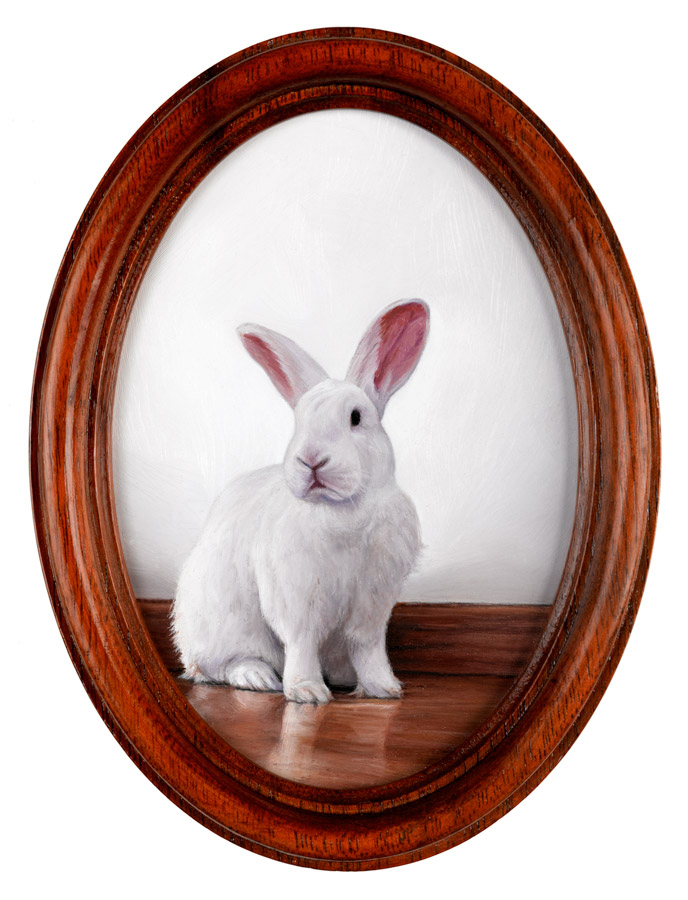
White rabbit oil painting Rebecca Luncan

The White Rabbit
oil on aluminum
4 1/2″ x 3 1/4″

I’ve been following the white rabbit down the social media rabbit hole, and with every post, I’m growing out of my social media dread.

Until this past year, my social media presence was limited to a Facebook account with 5 posts, ever. But a lot has happened since then, and I’ve started a Facebook business page, this blog, an Instagram account and registered as a business on Yelp and  Google+. Most recently, I have even started a Newsletter to help friends, fans and fellow artists follow my Monthly Miniature rabbit paintings or get updates on my blog. Phew!

I love people, but putting myself out there on the internet was an emotional hurdle. As a social media novice, the first few posts were extremely difficult, and the “post/publish” button would fill me with dread and anxiety. But with time and practice, it has gotten MUCH easier. Reading other blogs has taught me that consistency makes a huge difference and I’m finding it’s not just for the typical reasons such as people looking for new content. Constancy also helps keep me on track and allows me to think about meeting my goals instead of thinking about my fears.

Now I actually feel pretty good when I get something up. Connecting with people in a real world kind of way is part of what I live for. The sharing is starting to feel much less like I’m exposing myself and more like I’m connecting, largely due to all the support that I’ve gotten from everyone out there. Heartfelt thanks to everyone looking, sharing and buying, and to everyone enjoying my newsletter. And special thanks to everyone commenting and leaving reviews. It lets me know I’m on the right track.

If you are a beginning blogger or artist, or you are thinking about starting a blog, my advice is to dive right in. Do the best you can this time, and then do it a little better next time. There is so much to know that you can’t learn it all ahead of time, and so much is just conquering your fear.


post

Painting on Copper – May Monthly Miniature

My second Monthly Miniature of Charlemagne the rabbit, follows a 500 year tradition of painting on copper primed with a clove of garlic.

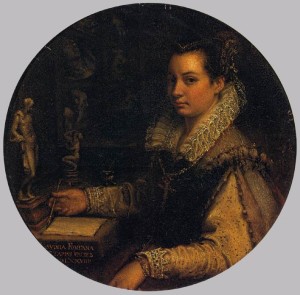
Lavinia_Fontana_-_Self-Portrait_in_a_Tondo_-_WGA7986

Lavinia Fontana (1552-1614)-Self-Portrait in a Tondo, 1597, oil on copper

Paintings on copper have been made by European artists since the mid 1500’s. Many examples from those first few hundred years survive even better than their canvas and wood panel counterparts.

Then as now, copper surfaces are first lightly sanded, cleaned with denatured alcohol, and topped with an optional layer of garlic juice. Garlic juice etches the surface of the copper and it’s most effective if followed by a coat of lead white. The process hasn’t changed over the years, except many more artists today (myself included) avoid the highly toxic lead white paint.

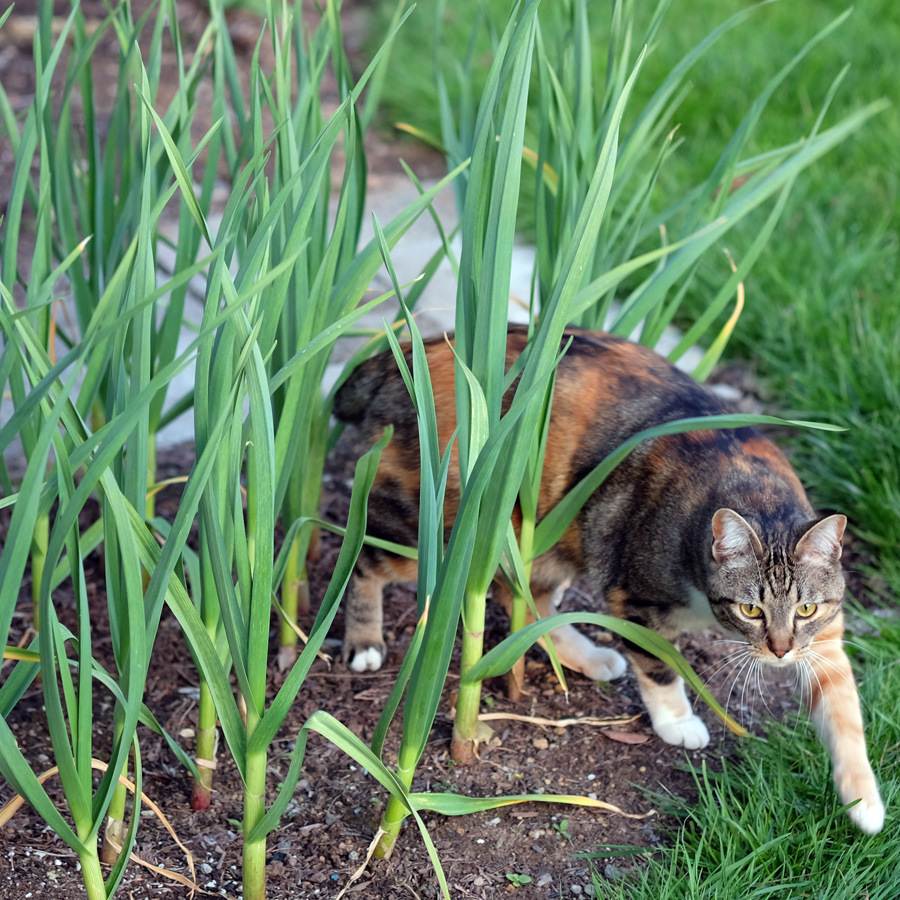
Artists don’t often get to grow their own art supplies. The garden is another huge creative outlet for me, and now a tiny bit of it is in this painting.

Fearsome Bală stalking in the garlic patch, Photo credit: Evan Grim

My cat, Bală stalking in the garlic patch, Photo credit: Evan Grim

Check out Alberti’s Window, An art History Blog for an in depth discussion about Lavinia Fontana’s self-portrait above in reference to her being a female painter in the 1500’s.

Subscribe to preview the Monthly Miniatures & get news about upcoming shows

Paintings of Rabbits: A New Miniature Painting, Every Month for One Year

Rabbit miniature oil paintin on aluminumg by Rebecca Luncan

Ellie, oil on aluminum, 4 1/2″ x 3″

This miniature painting of a rabbit marks the beginning of a big commitment.

It may not seem like much in the world of countless artists hosting “daily painting” blogs, but it’s a big deal for me. While continuing to make all of my other, larger works and commissioned pieces, I will make one miniature painting of a rabbit every month.

This first miniature is of my bunny Eleanor, who sits under my desk with her brother Charlie when I paint. House rabbits are a bit of work to keep out of trouble (chewing anything from cords to sofas) but once you get them trained and your house bunny-proofed, they’re a lot of fun. Having a rabbit run and leap onto the rug in front of you makes it all worth while.

Thanks for looking and I hope you check back the first Monday of the Month to see more of the miniatures as they progress!

Hand Finished Antique Frame

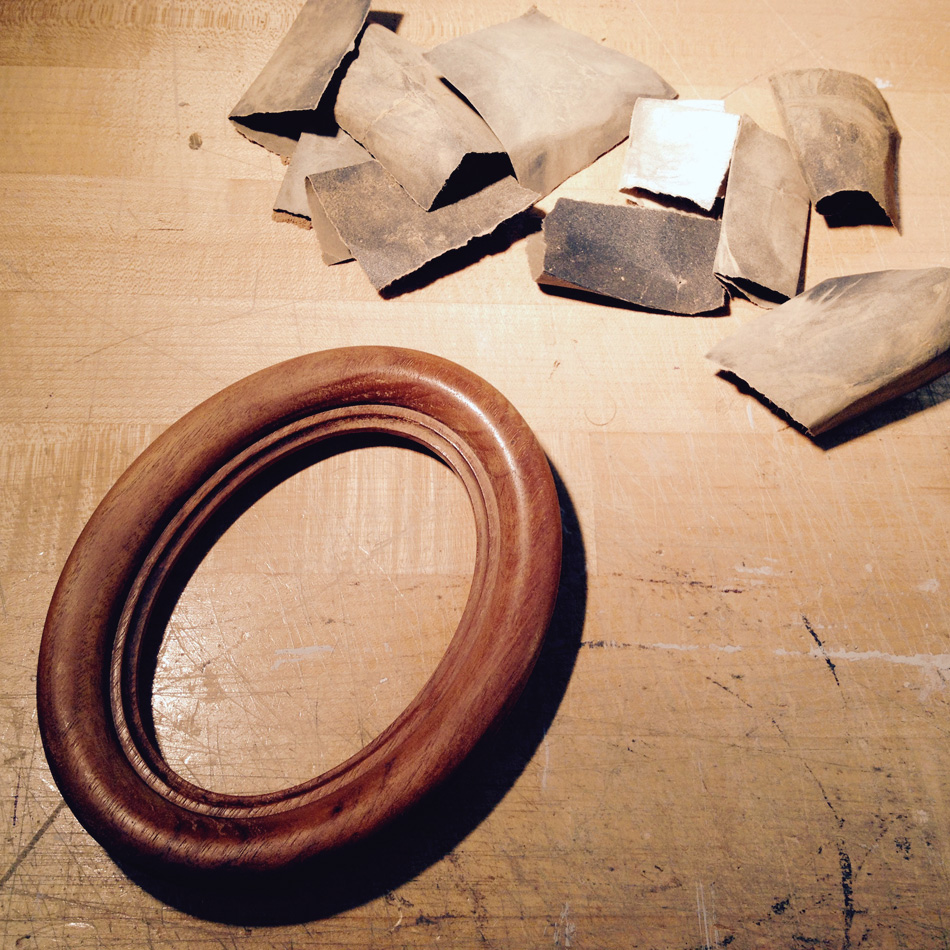
Each of the paintings of rabbits will be framed and ready to hang when posted. Although they are very small, they sometimes take a surprisingly long time to paint. I’ve also been known to spent almost as much time on the frame, so it adds up to a lot of work. The frames for this series were sent to me from my sister, Theresa, who found dozens of unfinished, dirty and wonderful wooden frames from the 1920’s. Below you can see what the frame on Ellie looked like just before the wonders of the french polish.

Antique Frame - French Polish in progress

Antique Unfinished Frame – French Polish in progress