The Artist’s Magazine 33rd Annual Art Competition

Reclining Rabbit oil painting miniature by Rebecca Luncan

Reclining Rabbit – November 2015, oil on aluminum, 4.25″ x 3/25″

“Reclining Rabbit” selected as finalist in Artist’s Magazine annual art competition

I didn’t win the top prize, but it’s still nice to be selected as a finalist from among 7,300+ entries. A selection of finalists will be featured in online and print publications in the coming months, and all of the finalists will be announced in their January/February 2017 issue. I look forward to seeing the line-up, my congratulations to everyone selected!

Busy as a Bee! How many layers does it take to make a painting?

Into the Country- Honey Bees, oil on copper by Rebecca Luncan

Into the Country- Honey Bees, oil on copper, 4″ x 4″

Making a painting, one layer at a time.

As a new mom, my time is more precious then ever. Over the last few months, I’ve been finding ways to use the big and small (more like small and smaller) chunks of time so I’m sure to use all of my art making time wisely. To do this, looking at all the steps one by one was very useful for me. The process of making a painting is different for every artist, and below you will find the steps it takes for me to compete a painting, from start to finish. Commissions are slightly different, and I’ll share the steps for one of those in a future post.

  1. Sketching out the idea. First I need to know what I’m going to be painting. I brainstorm ideas in my sketch book, do research, play with different approaches to the composition and try to get an overall sense of what I’m wanting to accomplish. This is my favorite way to use small blocks of time.
  2. Photo session. I work from photographs, so now’s the time to get some images to paint from. It helps to have a strong concept in mind before taking photos, but it’s equally important to stay flexible, and to be open to new ideas as they come. Sometimes it goes just as planned, but occasionally it takes two photo sessions to get what I’m looking for, or I may even go with a different concept entirely!
  3. Photo editing.  Because my paintings are so detailed, I like to work out bugs in the composition in this stage, rather than as I paint. My reference image can look pieced together, but as long as the composition is balanced and the lighting is more or less how I want it, then the reference image does its job. I rarely make any alterations to the composition after this stage. Having worked as a graphic designer, doing this on the computer is really quick and natural for me.
  4. Painting Support. Once I figure out what the size and shape of my painting will be, I cut out the shape in either copper or aluminum and lightly sand the side I will be painting.
  5. Under-drawing. I always do a fairly detailed drawing on the metal before I begin applying paint. Since I’m not using paints here, I can do this step anywhere, and I can stop and start anytime. My new routine for the small paintings is to do my underdrawing while nursing.
  6. Under-painting. And now we’re finally going to start painting! The first layer of paint can be applied in full color or monochromatic, depending on the painting. Check out some of my paintings in this first stage in the In Progress category of my blog. This layer is usually fairly quick, but it’s best to have at least an hour, even for a miniature. Larger paintings will need several hours. I like to finish the underpainting all at once.
  7. Second Layer. I was taught in art school that you should work on every section of the painting during each painting session. This is to keep continuity in the palette and level of detail. After years of painting, however, I’ve found that it works for me to break up painting sessions during the second layer: working on the background first, then middle ground, then foreground. I do like to get every area of the painting to the same level of finish before adding much detail in any one area, though.
  8. Third layer. This is where the magic happens. Things start to look how they’re supposed to, and my subjects begin to come alive. It’s really important to have a nice long painting session for this layer. A focused two hours is the minimum. For a large painting, those nine-hour painting days (I kind of remember those!) feel amazing. It’s good to step back and look at the painting often during this stage. Sometimes an area that felt resolved will need some changes after another area is more finished, and my third layer, begins to become a fourth. Two good tricks during this stage are to take a photo or look at the painting in a mirror. Any “somethings just not right” mysteries are much easier to solve with a new perspective.
  9. Final touches. Here I’ll add a little or a lot, depending on how well that third (or fourth) layer went. This is my chance to make sure all the areas of the painting are tied together in terms of color mixing and for level of finish. I usually do this with glazing which is a painting process of adding translucent layers of paint.
  10. Finished! That’s it, right? Nope. Now the painting needs to be signed, varnished, documented and framed. There! Now it’s finished.
See all of the “Into the Country” Miniatures in the series on the Monthly Miniature page

On the Easel: July In Progress

Works In Progress, Monthly Miniatures Rabbit and Honey Bees, oil on copper, 4" x 4" each

Works In Progress: Monthly Miniatures ‘Rabbit’ and ‘Honey Bees’, each 4″ x 4″ painted in oil on copper

Busy as a bee! Working on two Monthly Miniatures at once.

Being a new mom means I really have to make good use of my limited studio time, and I have to be ready to use any spare moment. Though I am already the sort of artist to work on several pieces at once, it’s now especially useful for me to have several paintings in the works. Working in oils, one layer has to dry before the next one starts, which means lots of downtime where I can’t work, if I’m only working on one painting at a time. The drying time can be up to three days (‘Titanium White’ is the worst, it can take a week to dry if it’s cold in the studio). Though I only plan to finish the bees this month, I already have a head start on September’s miniature painting, and I’m excited to see it take form (‘Rabbit,’ above)!

Work In Progress, Rabbit Portrait, oil on copper, 2" x 2" by Rebecca Luncan

Work In Progress, Rabbit Portrait, oil on aluminum, 2″ x 2″

Even more rabbits for a group show in October at Childhood’s End Gallery

I’m really excited to be a part of an anniversary exhibition featuring small works at Childhood’s End Gallery in Olympia this fall. This little guy I found has lots of great colors in his fur, and I’m anxious to finish it! It will be displayed along with two portraits of my rabbits, Charlie and Ellie: I’ll post them all together when they’re ready!


artist Rebecca Luncan working in the studio on figurative oil painting

Work in progress, Oil on aluminum, 24″ x 36″

Steady as she goes! Progress on my figurative painting series

Somehow I’ve officially been working on this painting for a year! It’s large and detailed, and there has been a lot on my plate. But I am eager to wrap it up and continue with the series, so I have set a deadline to finish it by the end of the year! Expect to see more progress shots in coming months.

New Frames, New Challenges: Portrait of a Black Cat

Portrait of a Black Cat, oil on aluminum, 1.5" x 1" (unframed), by Rebecca Luncan

Portrait of a Black Cat, oil on aluminum, 1.5″ x 1″ (unframed)

The perfect frame for your picture? Or the perfect picture for your frame?

During my art school days I worked as a picture framer, which taught me a lot about how to present my own artwork. At that time, I actually framed very few of my paintings in traditional frames, but explored many nontraditional methods to hang and frame my artwork.

Miniature portrait painting by Rebecca Luncan

Miniature portrait painting by Rebecca Luncan

Miniature frames are always hard to come by, and “found objects” became my best friends. I used a wide variety of everyday objects as frames, like the large sanding wheel pictured here, and the frames began to inform the content and character of my paintings. I used a conduit box to hold a double-sided painting that rotated within its frame to reveal one face at a time, and that spawned a whole series of “turn paintings,” and other sculptural paintings, all inspired by the use of a found object as frames.

Now years later, I’m totally in love with traditional picture frames. Having learned how nontraditional frames can shape the painting itself (and be an essential part of the artwork), I can now appreciate the dialog between a traditional painting and its frame. Beautifully hand-finished wooden frames, or brushed or polished metal frames attract my eye and fascinate me nearly as much as the paintings within. I find that antique frames are the best of both worlds, combining the elegance of a traditional frame with the thrill of finding a unique object that shapes the painting it frames.

Sometimes making a match between a painting and its frame works right off the bat, and other times it takes trial and error. I happily framed all of my Rabbit Monthly Miniature paintings in little antique frames, handpicking each frame and cutting metal to fit it (I paint mostly on copper and aluminum) before ever dipping my brush in paint.

But when I became enamored with 1920’s celluloid and bone frames, often used to frame miniature portraits, I ordered about a dozen of them but had a hard time getting my first celluloid-framed painting to look right. The frame itself demands a lot of attention, and I found that although I was reasonably happy with the painting itself, it did not look right when paired with the frame. After months of thinking how I could make it work, I finally removed the painting from its frame to apply a few experimental coats of paint. I simplified the background, limited the pallet, and added highlights to the cat’s face (below) to make it a stronger focal point. I also got rid of the glass, which made it tougher to see the details in the black cat’s fur.

The lines radiating through the celluloid demand a strong focal point in the painting; the cat’s eye color echoes the background like the cat’s body echoes the frame. I’m much happier with the final painting—it even looks bigger to than the original—but I never would have arrived at this solution without having the frame to inform it. Click to see an in progress image in between the two stages.


Portrait of a Black Cat, First and final versions, oil on aluminum framed in an antique celluloid and brass frame, 1.5" x 1" (unframed)

Portrait of a Black Cat, First and final versions, oil on aluminum framed in an antique celluloid and brass frame, 1.5″ x 1″ (unframed).


This painting will be on view at Childhood’s End Gallery for their anniversary Small Works exhibition this October. If you’re in Olympia please come take a peek! They have a fantastic Arts Walk that happens only twice a year. Check back for more details.


Life of a Paintbrush

Quarter Horse Portrait in progress, oil on copper by Rebecca Luncan

Quarter Horse Portrait in progress, oil on copper


No matter your style, or your talent as an artist, the tools you use to make your artwork must also be up to the task.

An inventory of fresh brushes with nice, crisp points is essential, but sometimes even that isn’t enough. I go through several brushes even in these little paintings, and occasionally my worn brushes find new life when I need something finer than what I can buy. For instance, to get the fine detail in Chex’s eye, I trimmed a fraying brush down to a single hair.

Horse Portrait painting miniature, oil on copper by Rebecca Luncan

The completed painting,Quarter Horse (Chex My Cal Bar) – July 2016, oil on copper, 4″ x 4″

It’s hard to get a sense of how small this painting is, using my brush for reference in the in-progress image above, there’s already plenty of detail too fine for stock brushes.

This painting features my mother in law’s stallion, Chex. Chex My Cal Bar is a registered quarter horse with an excellent pedigree. A stallion for the first seventeen years of his life, he sired several foals. He was amazingly talented and athletic in his younger years, especially in his element “cutting” cows. He was gentle enough to put children or inexperienced riders on his back, and still is. Now retired, he spends his days with his daughter April and his longtime buddy Romeo, a miniature horse.


Woman’s Best Friend, A Painting of a Dog

pet portrait dog, oil on copper, 4" x 4"

Woman’s Best Friend – June 2016, oil on copper, 4″ x 4″

I have to admit a soft spot for dogs, and I love working to capture these special creatures’ personalities in my portraits.

For my Miniature painting of the month, my mother in law’s best friend Penny posed for me, as many of her barnyard friends have done before her. All my life, a dog has been part of my household and the series wouldn’t be complete without one.

Though dogs are often working members of a farm, Penny is about as useless as my Cavilear King Charles Spaniel as a herd dog. Penny decided sheep were best suited for dinner right around her second birthday. My Mona would never try to kill a sheep, but she certainly wouldn’t dream of herding one either. In fact, when I let my rabbits out into the back yard, my cat would help herd them in. Yes, you read correctly. She was amazing and would chase them into the house. My dog would usually sit in the doorway, blocking their entrance. As useless as working animals as they can be, they are unparalleled in the animal kingdom for their loyalty and companionship and are a must for any house in the country (and the city!).

Rabbits in retrospect, looking back from the final Monthly Miniature painting

Rabbit Painting

A Forest Still Life, after Matthias Withoos, March, 2016, oil on aluminum, 4.25″ x 3.25″

With the first year of Monthly Miniatures finished, I have more to paint than when I started

I often begin a series of paintings with a plan in mind, so although painting itself an act of exploration, I know roughly where I am going, so to speak. My Monthly Miniatures turned that process on its head, since when I began, I did not have a plan so much as a commitment: to make one miniature painting each month, for a year. It was only in the second month that I even decided to focus on rabbits.

Having so much freedom was hard at first, but trellised by limited structure, ideas continued to emerge and branch as I worked through the series. I began to realize that I could push my ideas further by taking my rabbits out of the studio and into new and imagined places, which in turn can creative narrative, or even pay homage to an artist or tradition I admire.

Now at the end of Monthly Miniatures: Rabbits, I have a few themes I am eager to develop in future work, and it feels great. Although the work makes no strong statement as a series, it became surprisingly meaningful for me, all by approaching the work more as a notebook or conversation than as an essay or a speech.

Charlie stands in for a 17th-century mushroom

Moon Rabbit, miniature oil painting of white rabbit by Rebecca Luncan

Moon Rabbit, oil on aluminum

Following from the painting, Moon Rabbit, I’ve placed Charlie in a romantic setting from a work of art I enjoy (“A forest floor still life with a frog and mushroom, mountains beyond”). As you can see, there is no mushroom but a rabbit instead.

The last of my first Monthly Miniature series pays homage to the 17th Century Dutch painter Matthias Withoos. I love Withoos for his naturalistic paintings, full of botanical specimens and insects and animals of all sorts. Withoos trained all seven of his children how to paint – even his daughters. It was expensive to give your children an education in the arts in the 1600’s and if you were lucky enough to be a woman trained in the field, you often worked in your fathers or husbands studio and your work was attributed to them. One of Matthias’s daughters Alida, however, is one of the rare women artist who had success creating artwork under her own name. Part of her success was likely from the fact that one of her biggest patrons, Agnes Block, was also a woman.

What’s next for Rabbits and Monthly Miniatures?

My studio walls are still covered in rabbity mockups and drawings. Although my commission schedule will keep me busy, do expect to see more and larger rabbit paintings and drawings the next year or two. As to the Monthly Miniatures, next week I will announce the new theme that will encompass the next 9 months and finish out 2016. Check back for details!

post

Moon Rabbit, A Miniature Oil Painting and My Journey from the Studio to a Land of Myths

The Myth of the Moon Rabbit

In my latest miniature, I pay homage to this cross-cultural legend, drawing from stories that span Japan, China, South America, and beyond. As I paint the rabbits in this series of Miniatures, I am also researching their historical role in artwork and mythology. I am especially captivated with the many stories that connect the rabbit with the moon. This month, I am paying homage to this cross-cultural body of mythology.

Busy Bunny, An Example of Virtue and Hard Work Across the Globe

Rabbits do like to keep occupied. Mine busy themselves remodeling their cardboard condos. But cultures around the world have had different ideas about what the rabbit in the moon might be up to.

Asia

In Japan’s late Heian period (794–1185), one story depicts the moon rabbit pounding mochi for rice cakes. This scene is preserved in the anthology Konjaku Monogatarishū. In Chinese folklore, the same rabbit mixes the elixir of life for the moon goddess Chang’e.

The root of those and other Asian myths is the Buddhist story from Jataka tales (Tale 316),

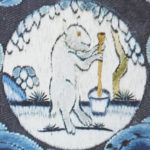
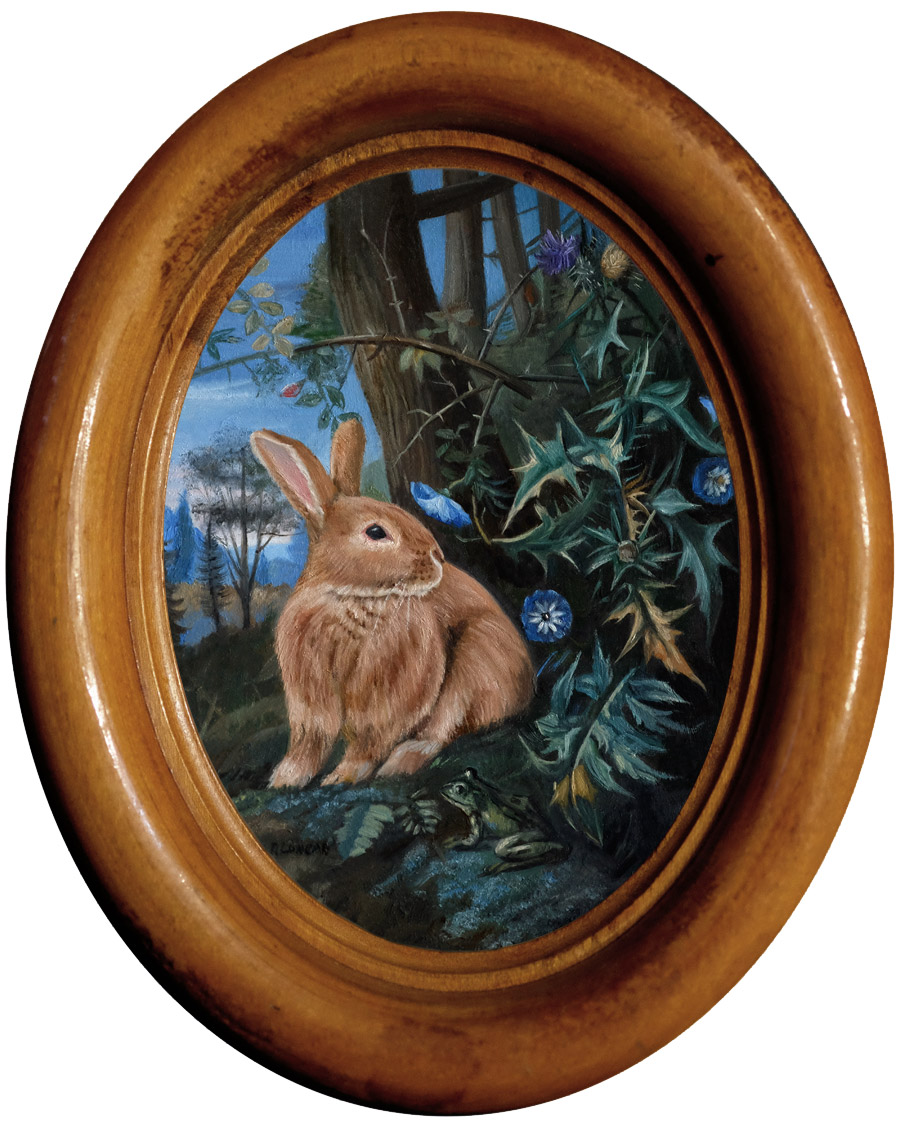
circa 4th century BCE. The tale opens with the deity Brahmā (Hindu god of creation), coming to the Earth in disguise as an old man. When he begs for food, four animals offer to help: a monkey, an otter, a jackal and a rabbit. The monkey brings fruits, the otter fish, the jackal steals a lizard and a milk-curd for him, but the rabbit only has grass to offer. Knowing that the old man can’t eat the grass, he instead offers himself and jumps into the old man’s fire. The deity then reveals himself and quenches the fire before the rabbit is burnt. He is so touched by the virtue and self-sacrifice of the rabbit that he carries him to the heavens, leaving his likeness upon the moon to remind us of his noble example.

South America

From the opposite side of the globe, a similar Aztec myth features the god Quetzalcoatl, who makes a journey on the earth as a man and finds himself unable to find food or water after walking a long way. Just when he thinks death is certain, a nearby rabbit offers herself as food to save his life. Moved by the rabbit’s offer, Quetzalcoatl elevates her to the moon, then lowers her back down. Her shadow remains on the moon for us to remember how a little rabbit touched the heart of a god.

Adventure and Fertility

And other myths connect the rabbit with the moon as well. Native American (Cree) myth describes the rabbit as an adventurer that visits the moon with help of a friendly crane. In Chinese folklore, the rabbit is so prolific that they can conceive with just the touch of moonlight.

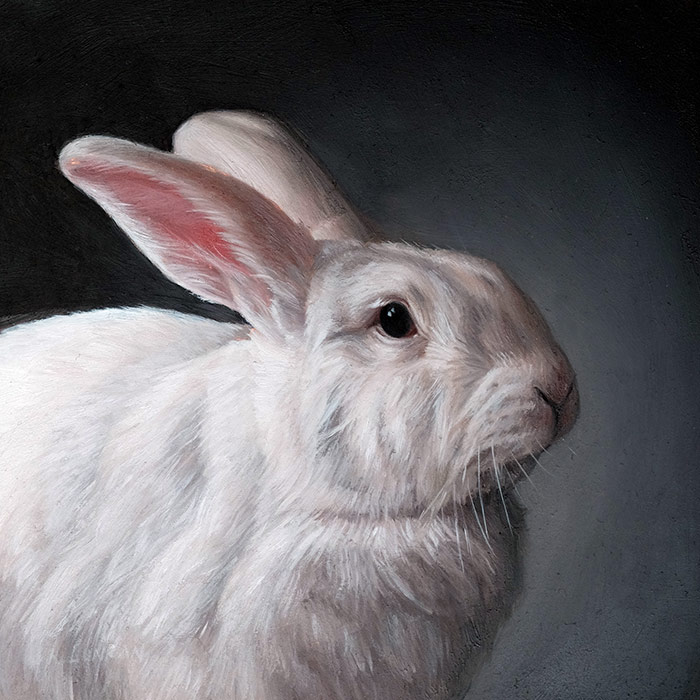
My Muse, the White Rabbit

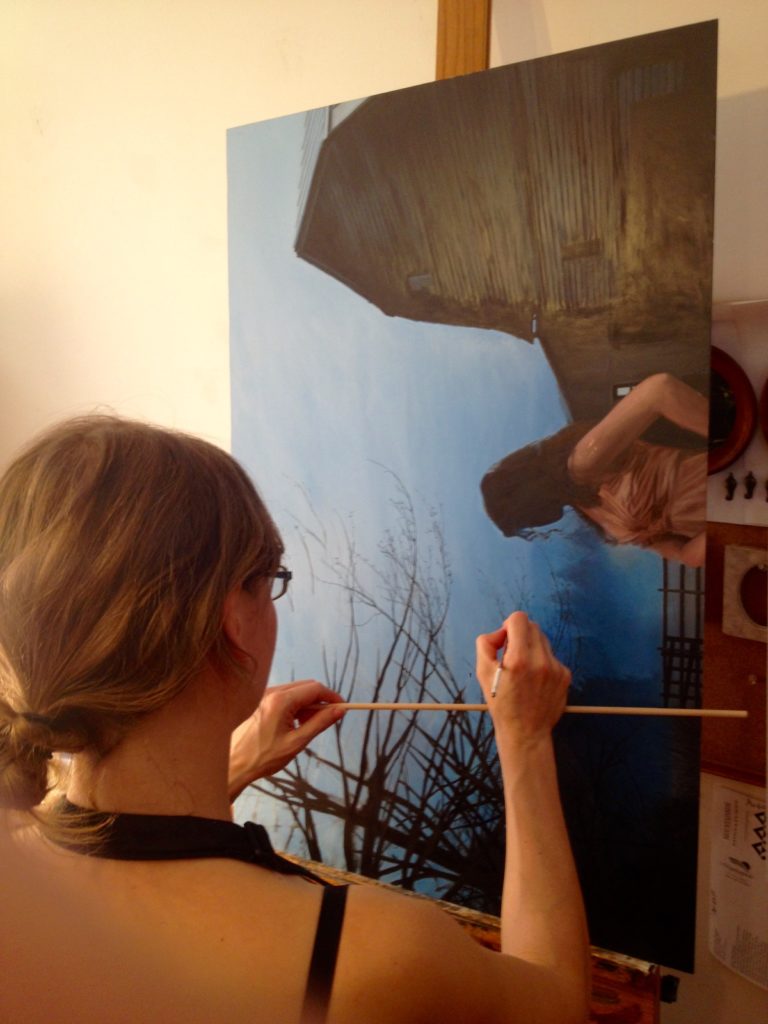
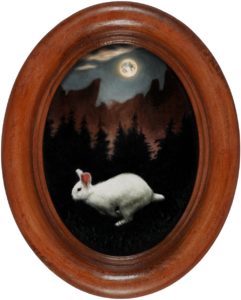
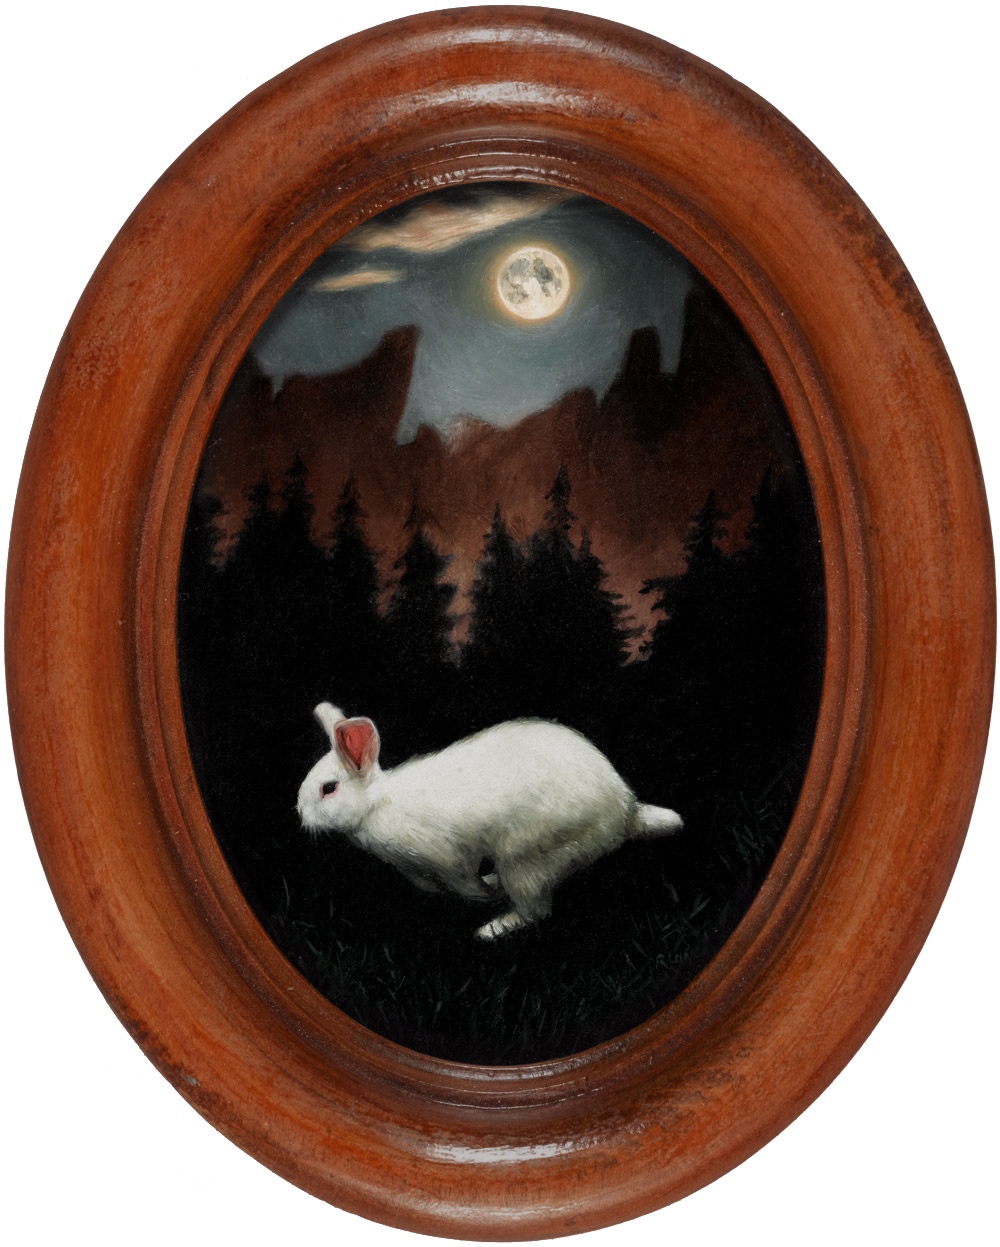
Rather than feature my rabbit in her ‘natural environment’ (i.e. the painting studio), this month Eleanor dashes into a romantic, otherworldly nighttime scene inspired by German Romantic painter Caspar David Friedrich. I am studying his work for a series of portraits, and his dramatic cliffs made a home first in my imagination, and now in this latest miniature.

My Ellie has been fixed so she won’t be doing any reproducing, moonlight or not. I also have my doubts that she’d impress the gods with shows of selfless generosity. Stealing her brothers treats is one of her favorite pastimes. In this painting, though, she is my Moon Rabbit, running wild and free. Who knows how far she can go!

The Second to last of the Monthly Miniature – Rabbits

Dream of the White Rabbit - February 2016 oil painting on aluminum, by Rebecca Luncan

Dream of the White Rabbit – February 2016
oil on aluminum,
5″ x 3 3/4″

Completing the eleventh miniature painting in a series of twelve continues a great journey for me and my rabbits.

Each one of these paintings I’ve been completing once a month over the last eleven months brings my rabbits and my mind further out of the studio and into my imagination. I’m fascinated by the progression of the works and how they have evolved and at the same time, stayed confined into the original idea: create and release one new miniature painting each month for one year of my house rabbits (complete with hand-finished antique frame).With only one more to go in this series, deciding what to paint last will be quite difficult.

I do plan to continue the Monthly Miniatures after March, but the theme will be different – details to come! Perhaps the rabbits will make a comeback for 2017. I’ve loved working on the series more than I would have ever expected and already have ideas drawn up for a dozen more! Until then, I hope you’ll enjoy the new series just as much and there is one more rabbit painting to come next month.

Nine on the Beach: a Portrait of More than a Person

9-on-beach

“Nine on the Beach”, oil on aluminum, 14″ x 14″

A first-person perspective captures the intimacy of a unique moment.

This image is so rich in textures to explore, from the surface of the water over the rippled sand, to the skin and all the various textiles. But what really makes this painting special is the story that inspired it and brought nine people together for a day to remember.

When I was first approached to make this painting, I admit I was a little skeptical. My client mentioned that he had taken the image the previous weekend and wanted a portrait made from it, with some slight modifications. It seemed like such a casual request to warrant countless hours making a painting that will last hundreds of years. I was compelled enough by the image to do a mock-up and give an estimate, yet I was curious, what made this image so special?

When my client accepted the estimate, he gave me the backstory:

Detail-9-on-beach

This image is from this past Saturday when we scattered my Mother-in-law’s ashes at the beach and I shot this photo when we were all standing in a circle before the ashes were scattered.  My idea of this painting is to give my wife a gift and a memorial from a really beautiful day.  Part of what I like are how different all of our feet are, dress shoes and suit from the service bare feet, etc. The idea of the seagull is a representation of Jean in the middle of us.

The story was so moving that it completely transformed my perspective on the commission, from being slightly skeptical to feeling deeply honored. What a stunning reminder of the power of a story to give meaning, that a few words of insight into a shared experience can make an image so deeply moving.

What a beautiful memorial, and what a loving husband to bring the idea to life.


framed-9-on-the-beach-Chris-Cummings

The final painting, framed and ready to gift wrap