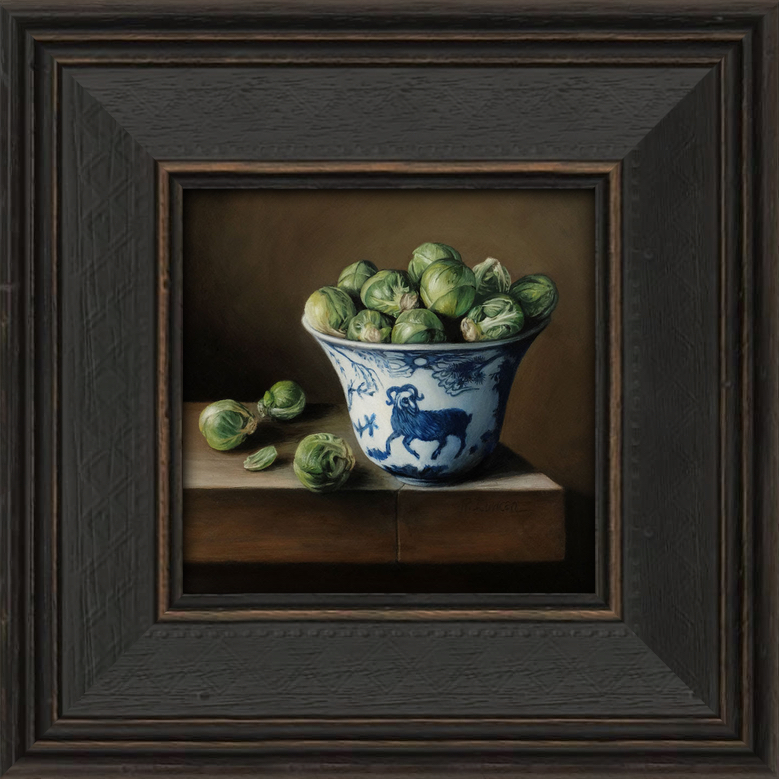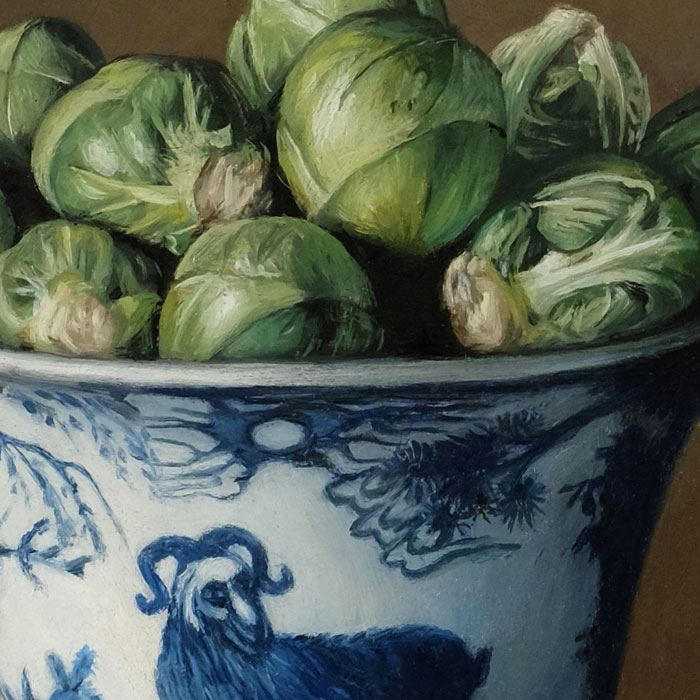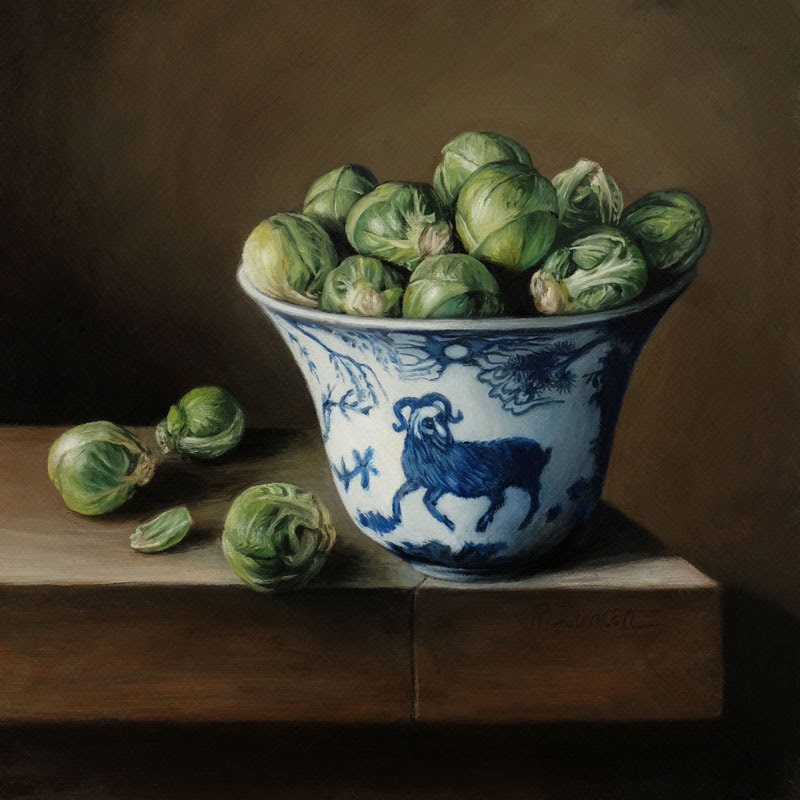
For latest painting in my series of Monthly MIniature’s I painted a bowl of brussels sprouts inspired by the works by Adriaen Coorte (ca. 1665 – after 1707).
With each of these paintings, I learn more about the Northern European still life tradition and I was drawn to the simplicity of Adriaen Coorte’s compositions. Because of my classical art training and experience of working at an art museum, I can usually identify the artist or at least the era in which a painting was made. Adriaen Coorte’s paintings are easily identifiable in the genre of Dutch Still Lifes because his paintings are unusually unpretentious. Many painting from the era have extravagant compositions, featuring priceless (at the time) tulips with a riot of color. By contrast, his painting are quiet and incredibly tender.
His painting of a bowl full of strawberries became the inspiration for my painting of brussels sprouts. I chose a bowl from the collection of the Seattle Art Museum, where I work part time, and picked brussels sprouts from my garden (just about the only thing in the garden in February!).
Learn more about my painting, “Brussels Sprouts and Porcelain Bowl” in an earlier blog post and see all of the paintings in the series on the Monthly Miniature gallery page. You can also sign up for my newsletter to see each painting right when they are finished and get the first opportunity to purchase, a day before it goes public on the web site.

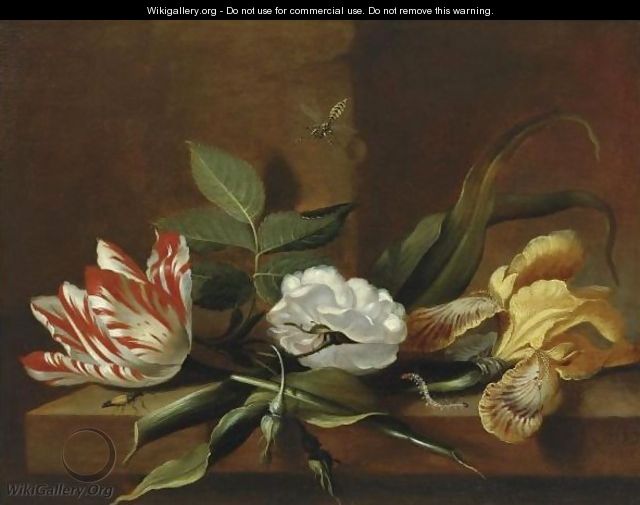
Adriaen Coorte, Wild Strawberries in a Wan Li Bowl, Oil on paper, mounted on wood, 11 5/8 x 8 7/8